Hyundai Creta: Driveshaft Assembly / Front Driveshaft
Hyundai Creta GS 2014-2019 Service Manual / Driveshaft and axle / Driveshaft Assembly / Front Driveshaft
Components and components location
| Components |
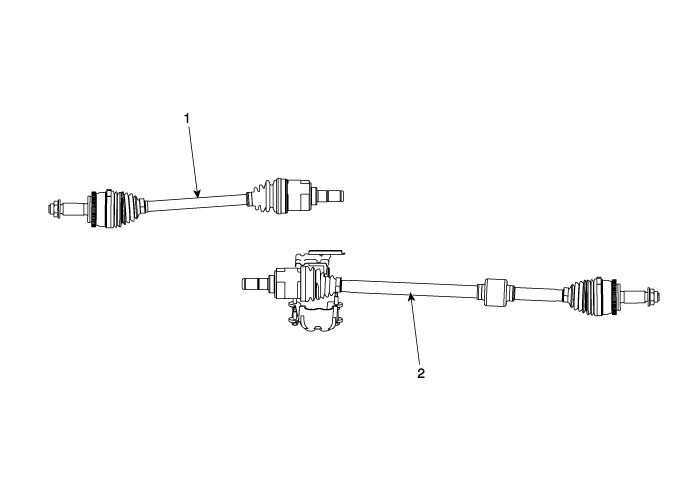
| 1. Driveshaft LH |
2. Driveshaft RH |
| Components |
| [RH] |
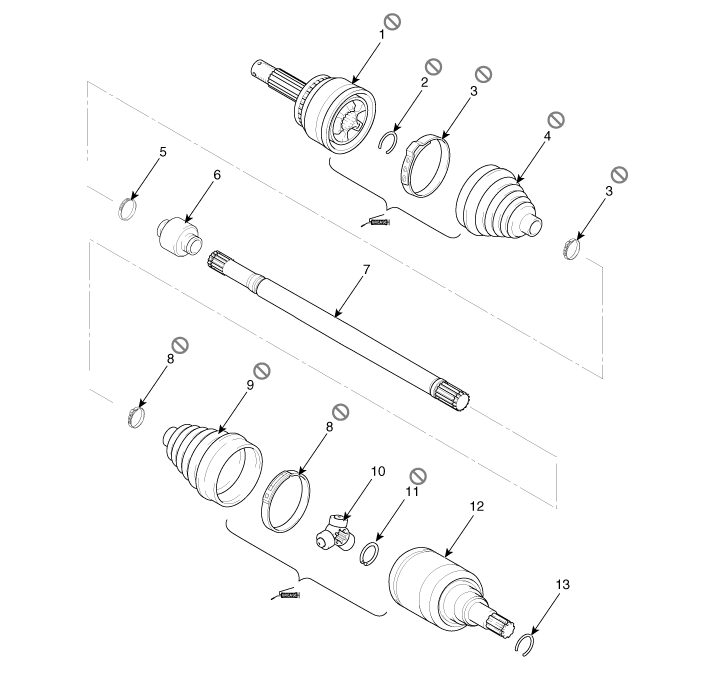
| 1. BJ assembly 2. Clip 3. BJ boot band 4. BJ boot 5. Dynamic damper band 6. Dynamic damper 7. Shaft |
8. TJ boot band 9. TJ boot 10. Spider assembly 11. Circlip 12. TJ housing 13. Circlip |
| [LH] |
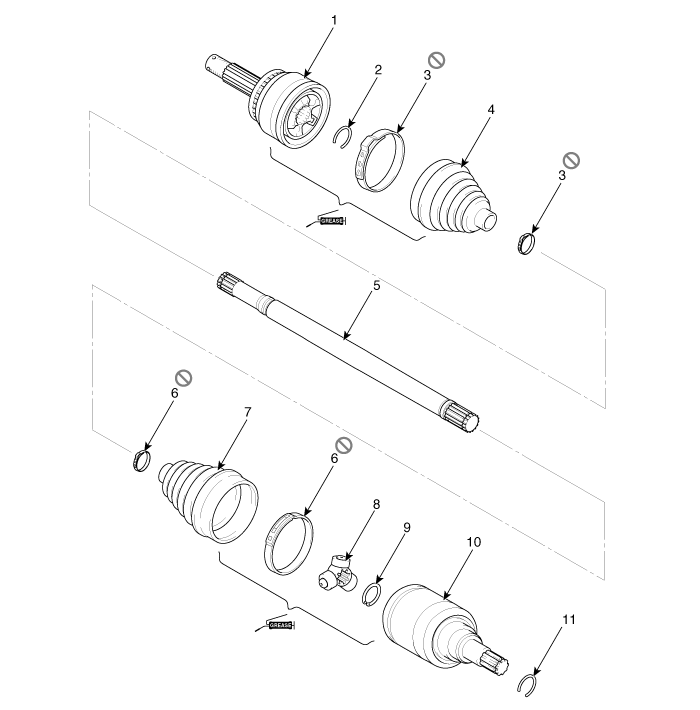
| 1. BJ assembly 2. BJ circlip 3. BJ boot band 4. BJ boot |
5. Shaft 6. TJ boot band 7. TJ boot 8. Spider assembly |
9. Snap ring 10. TJ case 11. Snap ring |
Repair procedures
| Removal |
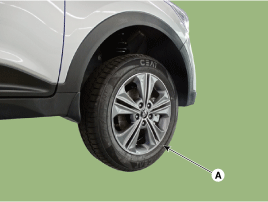
| 1. |
Remove the front wheel and tire (A) from front hub.
|

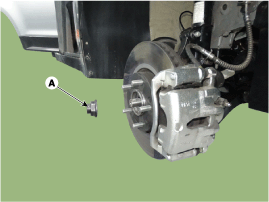
| 2. |
Remove the caulking nut (A).
|
| 3. |
Remove the tie rod end ball joint.
|
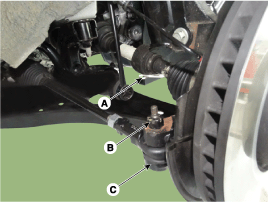
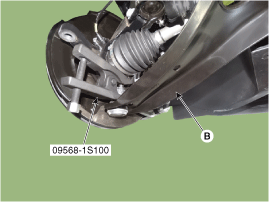
| 4. |
Remove the lower arm (B) from the knuckle by loosening the mounting
nut (A).
|

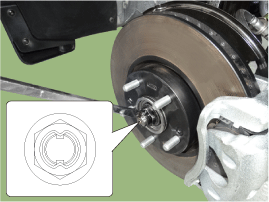
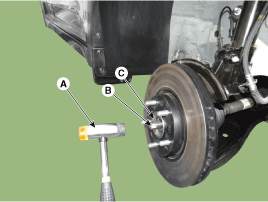
| 5. |
Using a plastic hammer (A), disconnect driveshaft (B) from the axle
hub (C).
|
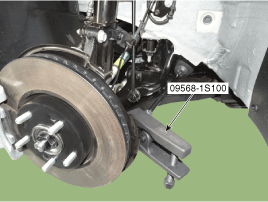
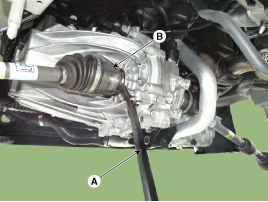
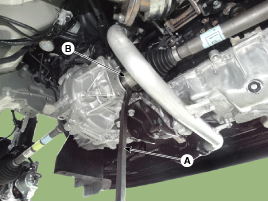
| 6. |
Insert a pry bar (A) between the transaxle case and joint case, and
separate the drive shaft (B) from the transaxle case.
[LH]
[RH]
|
| 7. |
Install in the reverse order of removal.
|
| 8. |
Check the front alignment.
(Refer to Suspension System - "Alignment")
|

 TJ Joint
Components and components location
Components
[LH]
1. BJ assembly
2. BJ circlip
3. BJ boot band
4. BJ boot
5. Shaft
6. TJ boot ...
Other information:
Hyundai Creta GS 2014-2019 Service Manual: Fuel Tank Air Filter: Repair procedures
Removal
1.
Remove the fuel tank.
(Refer to Fuel Delivery System - "Fuel Tank")
2.
Disconnect the vapor hoses (A).
3.
Remove the fuel tank air filter mounting bolts (B).
...
Hyundai Creta GS 2014-2019 Service Manual: Crankshaft
Components and components location
Components
1. Crankshaft sprocket
2. Crankshaft thrust bearing
3. Crankshaft upper main bearing
4. Crankshaft
5. CKPS wheel
6. Crankshaft lower main bearing
7. Crankshaft main bearing cap
Repair pr ...
© 2017-2026 www.hcrmangs.com
