Hyundai Creta: Rear Suspension System / Rear Shock Absorber
Hyundai Creta GS 2014-2019 Service Manual / Suspension System / Rear Suspension System / Rear Shock Absorber
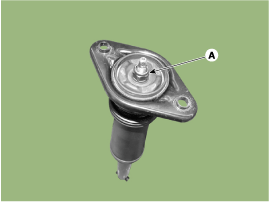
Components and components location
| Components |
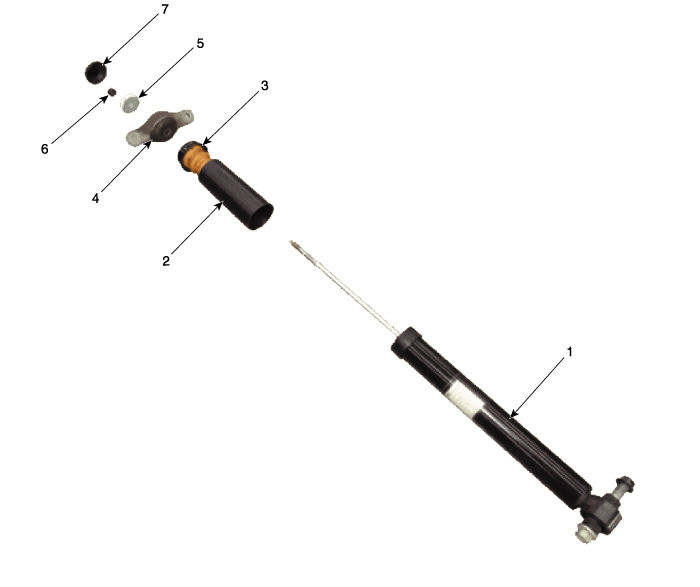
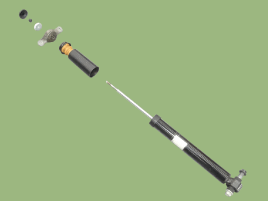
| 1. Shock absorber 2. Dust cover 3. Bumper rubber 4. Insulator assembly |
5. Washer 6. Lock nut 7. Insulator cover |
Repair procedures
| Removal |
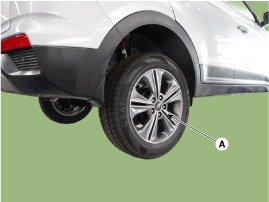
| 1. |
Loosen the wheel nuts slightly.
Raise the vehicle, and make sure it is securely supported.
|
| 2. |
Remove the rear wheel and tire (A).
|

| 3. |
Loosen the rear shock absorber (A) upper mounting bolt.
|
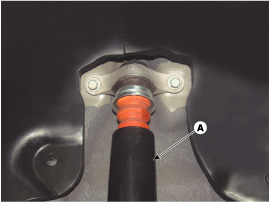
| 4. |
Loosen the bolt and then remove the rear shock absorber (A) from the
torsion beam axle.
|
| 5. |
Install in the reverse order of removal.
|
| Disassembly |
| 1. |
Loosen the lock nut (A) and then disassembly the shock absorber.
|
| 2. |
Separate the shock absorber as below illustration.
|
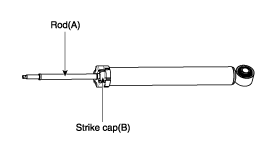
| Inspection |
| 1. |
Check the rubber parts for wear and deterioration.
|
| 2. |
Compress and extend the piston rod (A) and check that there is no abnormal
resistance or unusual sound during operation.
|
| Disposal |
| 3. |
Remove the strike cap (B) from the shock absorber assembly.
|
| 4. |
Remove the gas by Drilling a hole in the inner oil seal.
|
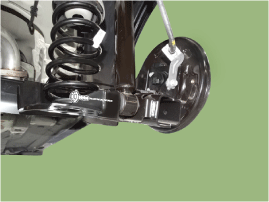
 Components and components location
Components Location
1. Torsion beam axle
2. Shock absorber
3. Coil spring assembly
...
 Rear Coil Spring
Components and components location
Components
1. Spring lower pad
2. Spring
3. Spring upper pad
Repair procedures
Removal
1.
...
Other information:
Hyundai Creta GS 2014-2019 Owners Manual: Manual transaxle operation
The manual transaxle has 6 forward
gears. The transaxle is fully synchronized
in all forward gears so shifting
to either a higher or a lower gear is
easily accomplished.
WARNING
Before leaving the driver’s seat,
always make sure the shift lever is
in 1st gear when the vehicle is
...
Hyundai Creta GS 2014-2019 Service Manual: Troubleshooting
Troubleshooting
Symptom
Suspect Area
Remedy (Refer to page)
Door glass fails to operate up and down
Incorrect window glass installation
Adjust position
Damaged or faulty regulator arm or reg ...
© 2017-2026 www.hcrmangs.com
