Hyundai Creta: Air Conditioning System / Condenser
Components and components location
| Components Location |
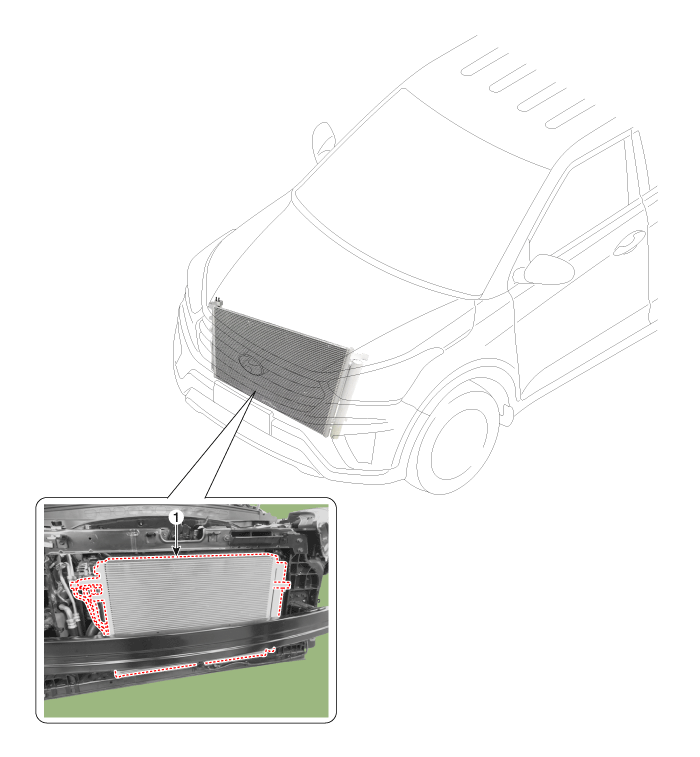
| 1. Condenser |
Repair procedures
| Inspection |
| 1. |
Check the condenser fins for clogging and damage. If they are clogged,
clean them with water, and blow them with compressed air. If they are
bent, gently bend them using a screwdriver or pliers.
|
| 2. |
Check the condenser connections for leakage, and repair or replace it,
if required.
|
| Replacement |
| 1. |
Recover the refrigerant with a recovery/ recycling/ charging station.
|
| 2. |
Disconnect the negative (-) battery terminal.
|
| 3. |
Remove the front bumper.
(Refer to Body - "Front Bumper Cover")
|
| 4. |
Remove the horn.
(Refer to Body Electrical System - "Horn")
|
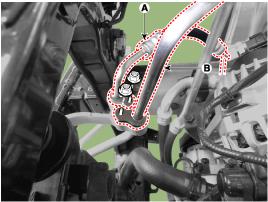
| 5. |
Remove the 2 nuts, and then disconnect the discharge line (A) and liquid
line (B) from the condenser.
|
| 6. |
Remove the air guard (A).
|
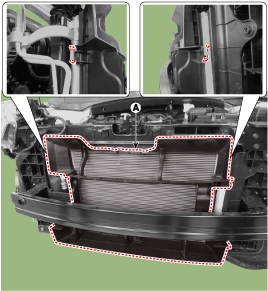
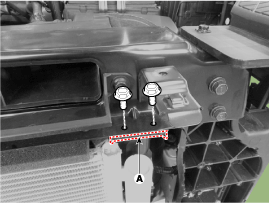
| 7. |
After loosening the mounting bolts, then remove the side air guard (A).
[LH]
[RH]
|
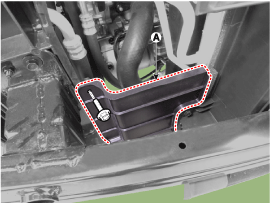
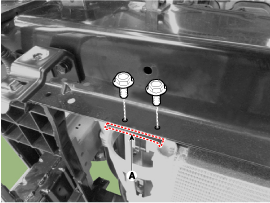
| 8. |
Loosen the mounting bolts and then remove the radiator mounting bracket
(A).
|
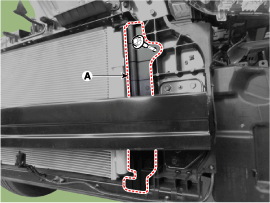
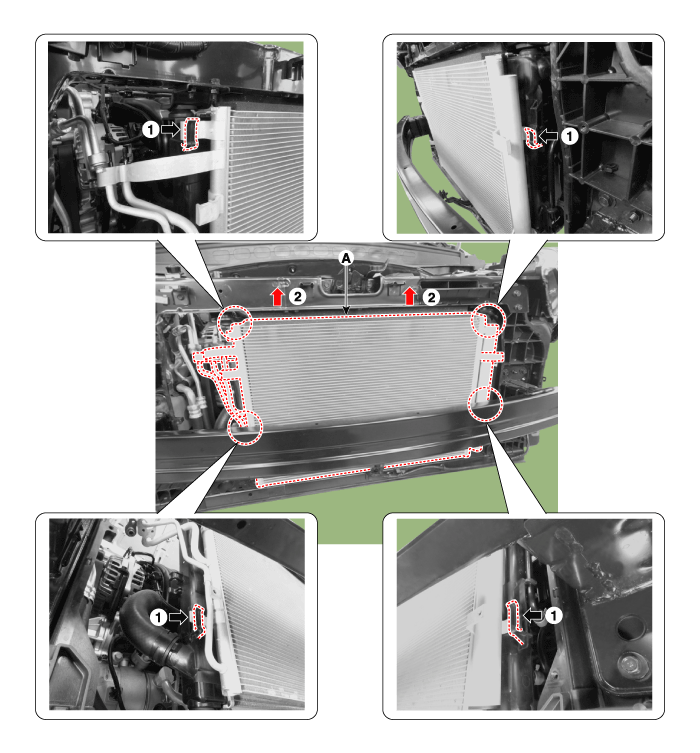
| 9. |
Remove the condenser (A) from radiator.
|
| 10. |
Install in the reverse order of removal.
|

 Compressor
Description and operation
Description
The compressor is the power unit of the A/C system.
It is located on the side of engine block and driven by a V-belt of the engine.
The c ...
 Receiver-Drier: Repair procedures
Replacement
1.
Remove the condenser.
2.
Remove the cap (B) on the bottom of the condenser with a L wrench (A).
...
Other information:
Hyundai Creta GS 2014-2024 Service Manual: TJ Joint
Components and components location
Components
[LH]
1. BJ assembly
2. BJ circlip
3. BJ boot band
4. BJ boot
5. Shaft
6. TJ boot band
7. TJ boot
8. Spider assembly
9. Retainer ring
10. TJ housing
11. Housi ...
Hyundai Creta GS 2014-2024 Service Manual: Troubleshooting
Troubleshooting
Problem Symptoms Table
Use the table below to help you find the cause of the problem. The numbers indicate
the priority of the likely cause of the problem. Check each part in order.
If necessary, replace these parts.
Symptom
...
© 2017-2024 www.hcrmangs.com
