Hyundai Creta: Cylinder Block Assembly / Cylinder Block: Repair procedures
Hyundai Creta GS 2014-2019 Service Manual / Engine Mechanical System / Cylinder Block Assembly / Cylinder Block: Repair procedures
| Disassembly |
|

|

| 1. |
Remove the engine and transaxle assembly from the vehicle.
(Refer to Engine and Transaxle Assembly - "Engine and Transaxle Assembly")
|
| 2. |
Remove the transaxle assembly from the engine assembly.
|
| 3. |
Remove the drive plate or flywheel.
|
| 4. |
Remove the rear oil seal.
(Refer to Cylinder Block Assembly - "Rear Oil Seal")
|
| 5. |
Install the engine assembly to engine stand for disassembly.
|
| 6. |
Remove the intake manifold with the electronic throttle control (ETC)
module.
(Refer to Intake And Exhaust System - "Intake Manifold")
|
| 7. |
Remove the exhaust manifold.
(Refer to Intake And Exhaust System - "Exhaust Manifold")
|
| 8. |
Remove the timing chain.
(Refer to Timing System - "Timing Chain")
|
| 9. |
Remove the cylinder head assembly.
(Refer to Cylinder Head Assembly - "Cylinder Head")
|
| 10. |
Remove the oil filter.
(Refer to Lubrication System - "Oil Filter")
|
| 11. |
Remove the oil pressure switch.
(Refer to Lubrication System - "Oil Pressure Switch")
|
| 12. |
Remove the crankshaft position sensor.
(Refer to Engine Control/Fuel System - "Crankshaft Position Sensor (CKPS)")
|
| 13. |
Remove the oil pan and the oil screen.
(Refer to Lubrication System - "Oil Pan")
|
| 14. |
Remove the ladder frame.
(Refer to Cylinder Block Assembly - "Piston And Connecting Rod")
|
| 15. |
Check the connecting rod side clearance.
(Refer to Cylinder Block Assembly - "Piston And Connecting Rod")
|
| 16. |
Check the connecting rod bearing cap oil clearance.
(Refer to Cylinder Block Assembly - "Piston And Connecting Rod")
|
| 17. |
Remove the piston and connecting rod assemblies.
(Refer to Cylinder Block Assembly - "Piston And Connecting Rod")
|
| 18. |
Check the main bearing oil clearance.
(Refer to Cylinder Block Assembly - "Crankshaft")
|
| 19. |
Check the crankshaft end play.
(Refer to Cylinder Block Assembly - "Crankshaft")
|
| 20. |
Remove the crankshaft.
(Refer to Cylinder Block Assembly - "Crankshaft")
|
| 21. |
Remove the water inlet fitting and thermostat.
(Refer to Cooling System - "Thermostat")
|
| 22. |
Remove the knock sensor.
(Refer to Engine Control/Fuel System - "Knock Sensor (KS)")
|
| Inspection |
| 1. |
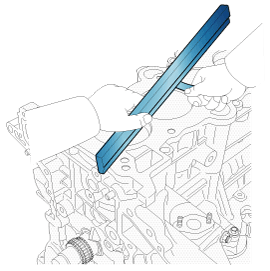
Using a gasket scraper, remove all the gasket material from the top
surface of the cylinder block.
|
| 2. |
Using a soft brush and solvent, thoroughly clean the cylinder block.
|
| 3. |
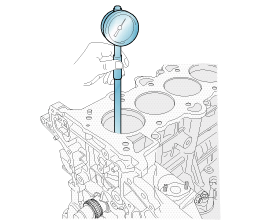
Inspect the top surface of cylinder block for flatness.
Using a precision straight edge and feeler gauge, measure the surface
contacting the cylinder head gasket for warpage.
|
| 4. |
Inspect the cylinder bore.
Visually check the cylinder for vertical scratchs.
If deep scratchs are present, replace the cylinder block.
|
| 5. |
Inspect the cylinder bore diameter.
Using a cylinder bore gauge, measure the cylinder bore diameter at position
in the thrust and axial direction.
|
| Reassembly |
| 1. |
Install in the reverse order of disassembly.
|
 Crankshaft
Components and components location
Components
1. Crankshaft sprocket
2. Crankshaft thrust bearing
3. Crankshaft upper main bearing
4. Crankshaft
5. CK ...
 Cooling System
...
Other information:
Hyundai Creta GS 2014-2019 Service Manual: Troubleshooting
Troubleshooting
Symptom
Possible cause
Remedy
Hard steering
Improper front wheel alignment
Excessive turning resistance of lower arm ball joint
Low tire pressure
No power assist
Correct
Replace
...
Hyundai Creta GS 2014-2019 Service Manual: Special service tools
Special Service Tools
Tool Name / Number
Illustration
Description
Crankshaft front oil seal installer
09455-21200
Installation of the front oil seal
Valve stem oil seal installer
...
© 2017-2026 www.hcrmangs.com
