Hyundai Creta: Interior Trim / Door Scuff Trim
Components and components location
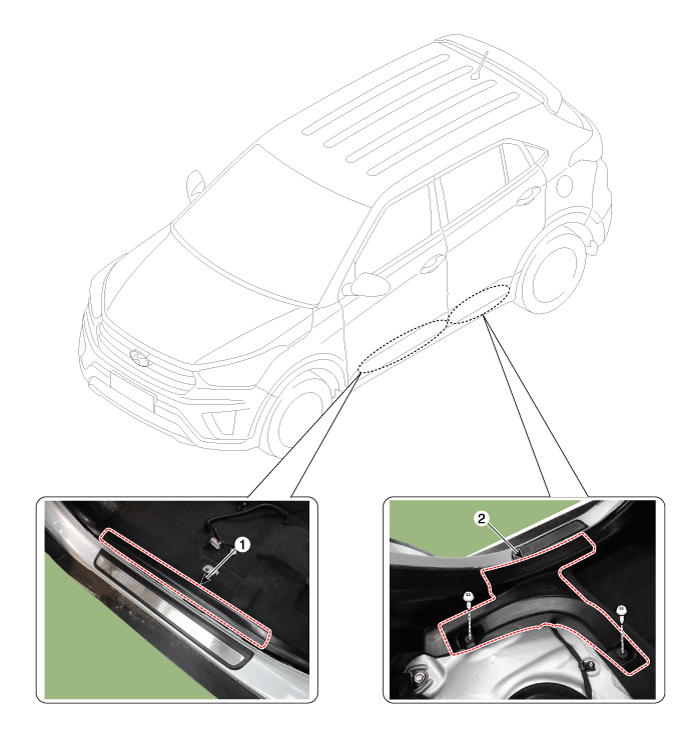
1. Front door scuff trim
|
2. Rear door scuff trim
|
Repair procedures
| • |
Put on gloves to protect your hands.
|
|
| • |
When prying with a flat-tip screwdriver or use a prying trim
tool, wrap it with protective tape, and apply protective tape
around the related parts, to prevent damage.
|
| • |
Use a plastic panel removal tool to remove interior trim pieces
to protect from marring the surface.
|
| • |
Take care not to bend or scratch the trim and panels.
|
|
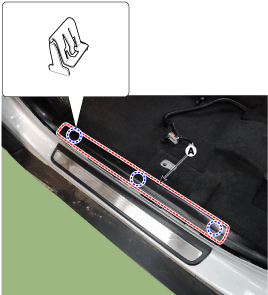
| 1. |
Using a screwdriver or remover, remove the front door scuff tirm (A).
[Front]
|
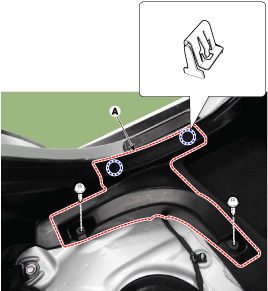
| 2. |
Using a screwdriver or remover, remove the rear door scuff tirm (A).
[Rear]
|
| 3. |
To install, reverse the removal procedure.
| •
|
Replace any damaged clips.
|
|
|
Components
1. Front pillar trim
2. Cowl side trim
3. Front door scuff trim
4. Center pillar lower trim
5. Center pillar upper trim
6. Rear door scuff t ...
Components and components location
Component Location
1. Cowl side trim
Repair procedures
Replacement
...



 Components and components location
 Cowl Side Trim