Hyundai Creta: Timing System / Drive Belt
Components and components location
| Components |
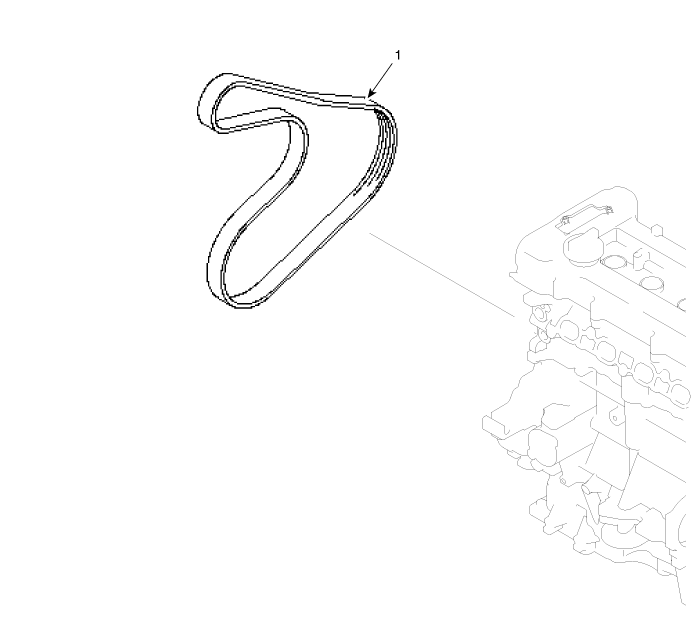
| 1. Drive Belt |
Repair procedures
| Removal and Installation |
| 1. |
Disconnect the battery negative terminal.
|
| 2. |
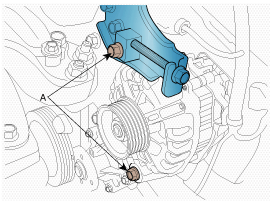
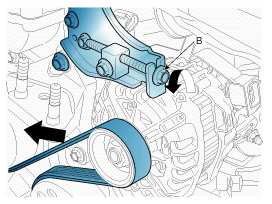
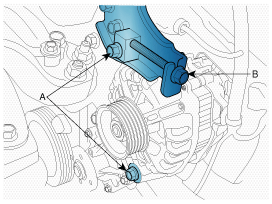
Loosen the alternator mounting bolts (A) and then turn the adjusting
bolt (B) counterclockwise to loose the drive belt tension.
|
| 3. |
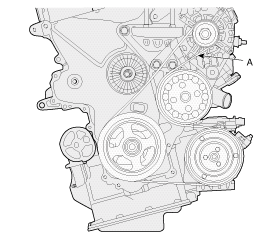
Remove the drive belt (A).
|
| 4. |
Install in the reverse order of removal.
|
| Inspection |
Drive Belt Inspection
| 1. |
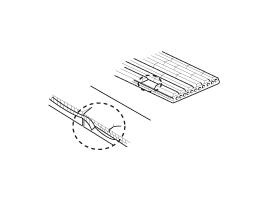
Visually check the belt for excessive wear, frayed cords etc.
If any defect has been found, replace the drive belt.
|
| 2. |
Measure the drive belt tension. If necessary, drive belt and adjust.
|
| Adjustment (Without HPS only) |
Drive belt tension measurement and adjustment
| Belt tension measurement |
Measure the belt tension using a mechanical tension gauge or a sonic tension
meter.
|
Tension :
New belt :
686.5 ~ 784.5 N (70.0 ~ 80.0 kgf, 154.3 ~ 176.4 lbf)
Used belt :
490.3 ~ 588.4 N (50.0 ~ 60.0 kgf, 110.2 ~ 132.3 lbf)
|
|
| Using a mechanical tension gauge |
| 1. |
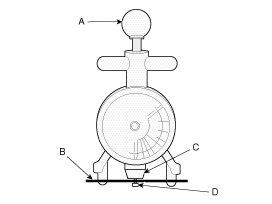
While pressing the handle (A) of the gauge, insert the belt (B) between
pulley and pulley (or idler) into the gap between spindle (C) and hook
(D).
|
| 2. |
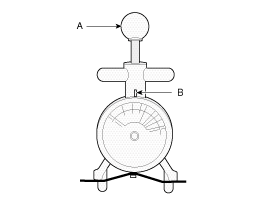
After releasing the handle (A), read a value on the dial pointed by
the indicator (B).
|
| Using a sonic tension meter |
| 3. |
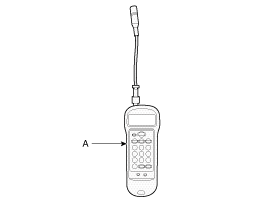
Input the belt specifications into the tension meter.
|
||||||||||||||||||||||||||||
| 4. |
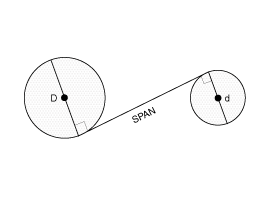
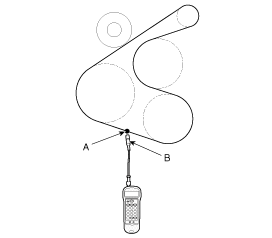
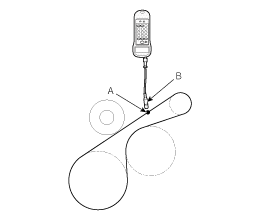
Locate the micro phone (B) close to the center of belt span (A) and
bounce the belt by finger 2~3 times. Read a value on the display.
[With A/C]
[Without A/C]
|
| If adjustment is necessary: |
| 5. |
Loosen the mounting bolts (A).
|
| 6. |
Tighten the adjusting bolt (B) counterclockwise in loose tension ; loosen
the bolt clockwise in high tension.
|
| 7. |
Recheck tension of the belt.
|
| 8. |
After adjusting tension, tighten the through bolts.
|
 Components and components location
Components
1. Timing
chain
2. Timing chain guide
3. Timing chain tensioner arm
4. Timing chain auto tensioner
5. Timing chain cover
6. Drive belt idler
...
 Idler
Idler
Components and components location
Components
1. Idler
Repair procedures
Removal and Installation
1.
Remove the drive bel ...
Other information:
Hyundai Creta GS 2014-2025 Service Manual: Hood Latch
Components and components location
Component Location
1. Hood latch assembly
Repair procedures
Replacement
1.
After loosening the mounting clips, then remove the air duct (A).
2.
...
Hyundai Creta GS 2014-2025 Service Manual: Front Mud Guard: Repair procedures
Replacement
•
Put on gloves to protect your hands.
•
When ...
© 2017-2025 www.hcrmangs.com


