Hyundai Creta: Driveshaft Assembly / Dynamic Damper
Hyundai Creta GS 2014-2019 Service Manual / Driveshaft and axle / Driveshaft Assembly / Dynamic Damper
Components and components location
| Components |
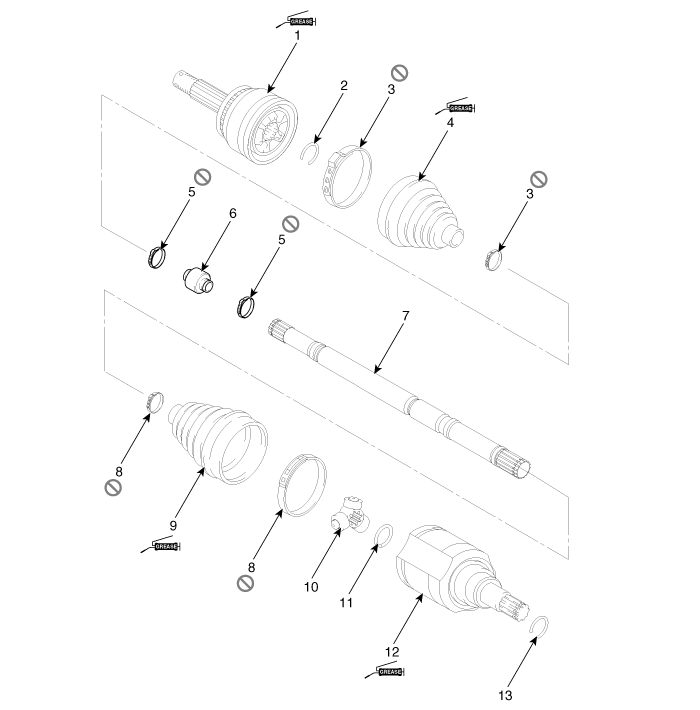
| 1. BJ
assembly 2. BJ circlip 3. BJ boot band 4. BJ boot |
5. Dynamic
damper band 6. Dynamic damper 7. Shaft 8. TJ boot band |
9. TJ
boot 10. Spider assembly 11. Retainer ring 12. TJ housing |
13. Housing
circlip |
Repair procedures
| Removal |
| 1. |
Remove the front driveshaft.
(Refer to Driveshaft Assembly - "Front Driveshaft")
|
| 2. |
Remove the TJ joint assembly.
(Refer to Driveshaft Assembly - "TJ Joint")
|
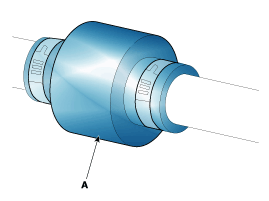
| 3. |
Remove the remove the both side of band (B) of the dynamic damper (A).
|
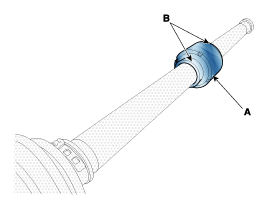
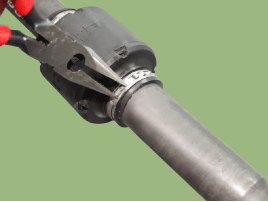
| 4. |
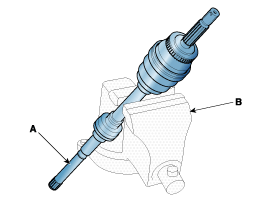
Fix the driveshaft (A) with a vice (B) as illustrated.
|
| 5. |
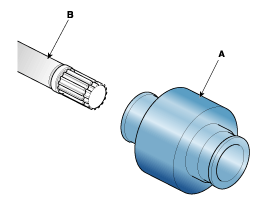
Apply soap powder on the shaft to prevent being damaged between the
shaft spline and the dynamic damper when the dynamic damper is removed.
|
| 6. |
Seperate the dynamic damper (A) from the shaft (B) carefully.
|
| Installation |
| 1. |
Apply soap powder on the shaft to prevent being damaged between the
shaft spline and the dynamic damper.
|
| 2. |
Install the dynamic damper.
|
| 3. |
Install the dynamic damper boot bands.
|
| 4. |
Install the TJ joint assembly.
(Refer to Driveshaft Assembly - "TJ joint")
|
| 5. |
Install the front driveshaft.
(Refer to Driveshaft Assembly - "Front Driveshaft")
|
| 6. |
Check the front alignment.
(Refer to Suspension System - "Alignment")
|
 TJ Joint
Components and components location
Components
[LH]
1. BJ assembly
2. BJ circlip
3. BJ boot band
4. BJ boot
5. Shaft
6. TJ boot ...
 BJ Boot
Components and components location
Components
1. BJ
assembly
2. BJ circlip
3. BJ boot band
4. BJ boot
5. Dynamic
damper band
6. Dynamic damper
...
Other information:
Hyundai Creta GS 2014-2019 Service Manual: Exhaust Manifold
Components and components location
Components
1. Heat protector
2. Exhaust manifold
3. Gasket
4. Exhaust manifold stay
Repair procedures
Removal and Installation
1.
Remove the engine cover.
2.
...
Hyundai Creta GS 2014-2019 Service Manual: ESCL(Electronic Steering Column Lock)
Components and components location
Component
Repair procedures
Removal
1.
Disconnect the negative (-) battery terminal.
2.
Remove the crash pad lower panel.
(Refer to Body - "Crash Pad Lower Panel")
...
© 2017-2026 www.hcrmangs.com
