Hyundai Creta: ESP(Electronic Stability Program) System / ESP Control Unit
Hyundai Creta GS 2014-2019 Service Manual / Brake System / ESP(Electronic Stability Program) System / ESP Control Unit
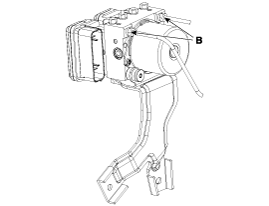
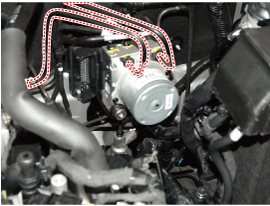
Components and components location
| Components |
| [LHD] |
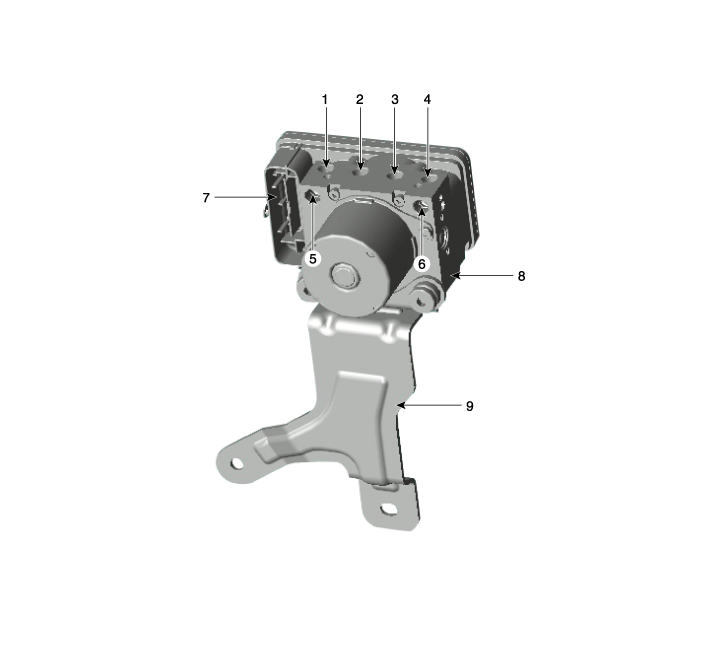
| 1. Front - RH 2. Rear - LH 3. Rear - RH 4. Front - LH 5. MC2 |
6. MC1 7. ESP control module connector 8. ESP control module(HECU) 9. Bracket |
| [RHD] |
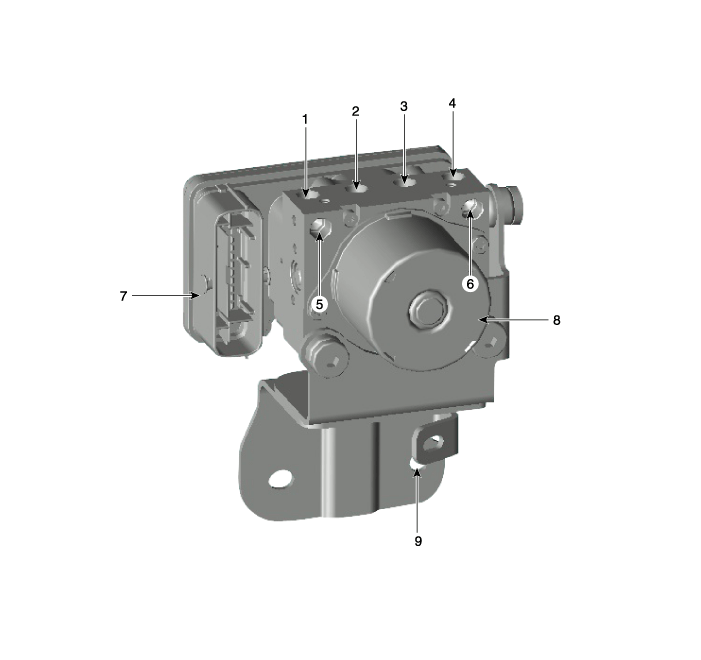
| 1. Front - RH 2. Rear - LH 3. Rear - RH 4. Front - LH 5. MC2 |
6. MC1 7. ESP control module connector 8. ESP control module(HECU) 9. Bracket |
Repair procedures
| Removal |
[LHD]
| 1. |
Turn the ignition switch OFF.
|
| 2. |
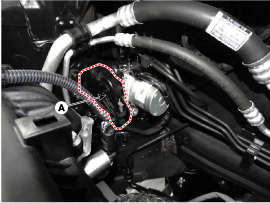
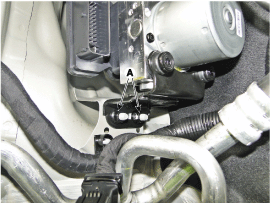
Pull up the lock of the HECU connector (A) and then disconnect the connector.
|
| 3. |
Disconnect the brake tubes (A) and (B) from the HECU.
|
| 4. |
Loosen the HECU bracket bolts (A) and nut (B), then remove HECU and
bracket.
|


| 5. |
Remove the 3 bolts, then remove the bracket from HECU.
|
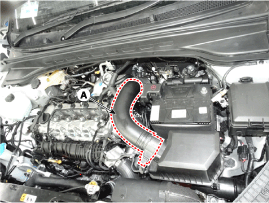
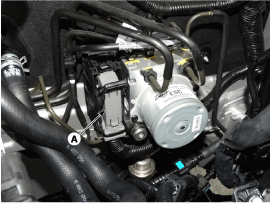
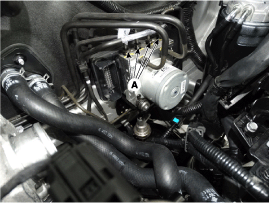
[RHD]
| 1. |
Turn the ignition switch OFF.
|
| 2. |
Remove the brake fluid from the master cylinder reservoir with a syringe.
|
| 3. |
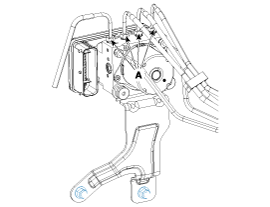
Remove the air cleaner intake hose (A).
|
| 4. |
Pull down the lock of the HECU connector and then disconnect the connector
(A).
|
| 5. |
Disconnect the brake tubes (A) from the HECU by unlocking the nuts counterclockwise
with a spanner.
|
| 6. |
Disconnect the brake tubes
(A) from the HECU by unlocking the nuts counterclockwise with a spanner.
|
| 7. |
Loosen the HECU bracket nuts (A) and then remove HECU and bracket.
|
| 8. |
Remove the bolts and then remove the bracket from HECU.
|
| Installation |
| 1. |
Install in the reverse order of removal.
|
| 2. |
Tighten the HECU mounting bolts and nuts to the specified torque.
|
| 3. |
After installation, bleed the brake system.
(Refer to ESP (Anti-Lock Brake System) - "ESP System Bleeding")
|
| Diagnosis procedure by using diagnostic device |
As manual for diagnosis methods by using diagnosis device, the main contents
are as follows:
Connect self-diagnosis connector(16pins) located in the lower of driver side
crash pad to self-diagnosis device, and then turn the self-diagnosis device
after key is ON.
Select the "vehicle model" and "ABS/ESC" on GDS vehicle selection screen, then
select OK.
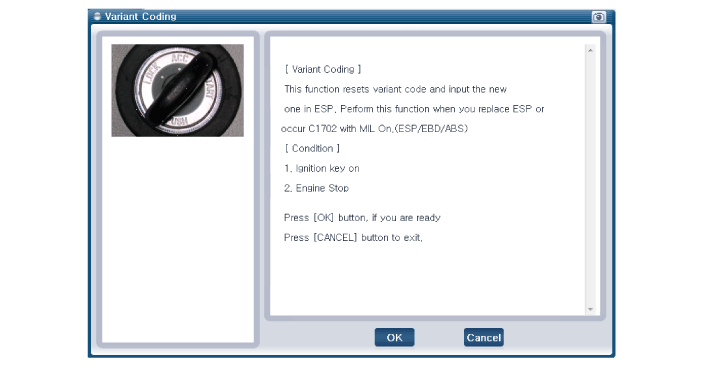
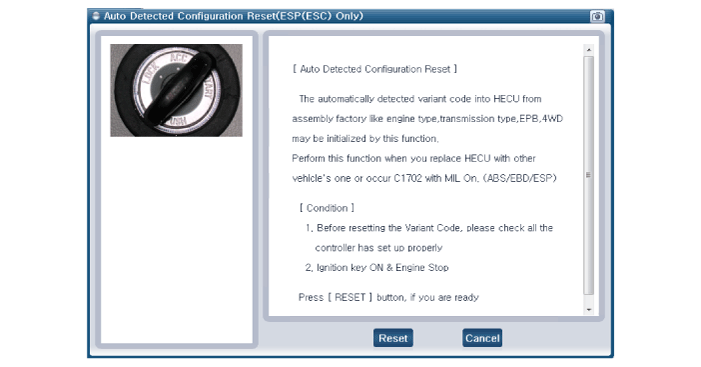
| [Variant Coding] |
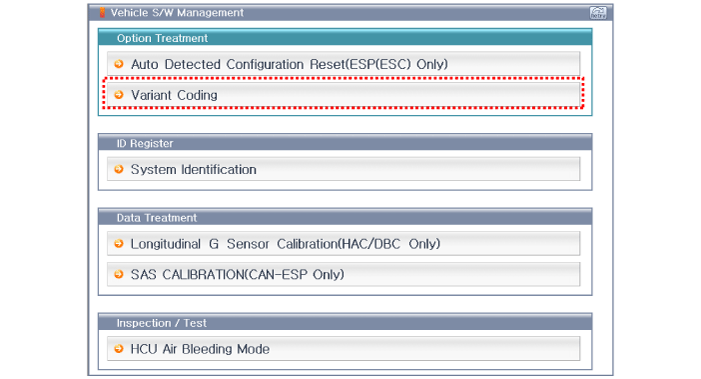
| [Auto Detected Sensor Calibration] |
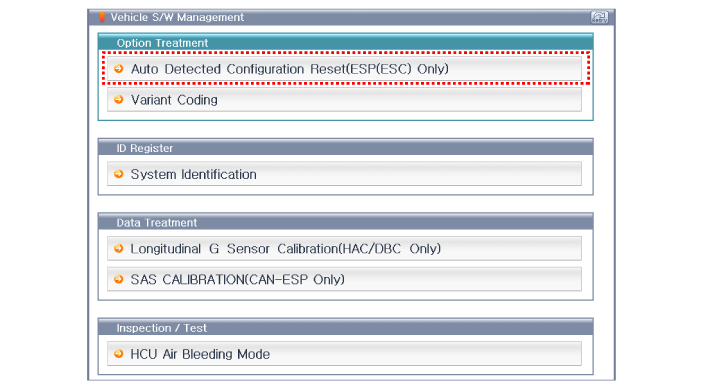
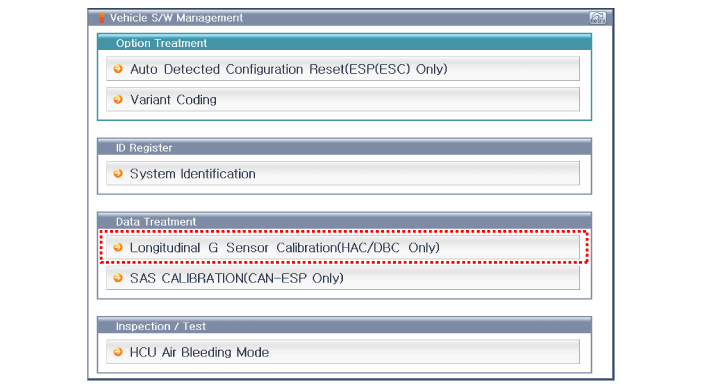
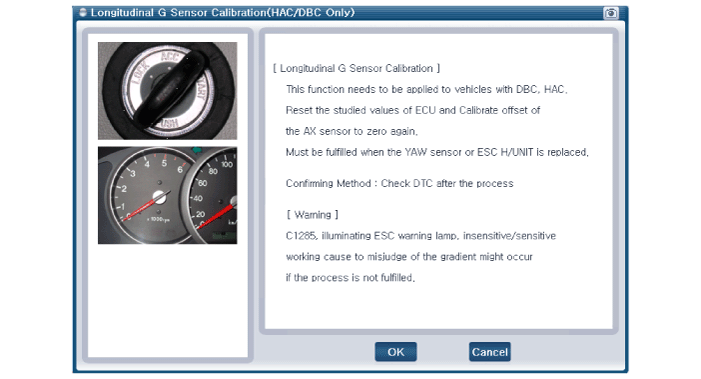
| [Longitudinal G Sensor Calibration] |
 Repair procedures
Repair procedures
Bleeding of Brake System
This procedure should be followed to ensure adequate bleeding of air and filling
of the ESC unit, brake lines and master cylinder with ...
 ESP OFF Switch
Description and operation
Description
1.
The ESP OFF switch is for the user to turn off the ESP system.
2.
The ESP OFF lamp is on when ESP ...
Other information:
Hyundai Creta GS 2014-2019 Service Manual: Cluster Fascia Panel
Components and components location
Component Location
1. Cluster fascia panel
Repair procedures
Replacement
ŌĆó
Put on gloves to protec ...
Hyundai Creta GS 2014-2019 Service Manual: Rear Door Power Window Regulator
Components and components location
Component Location
1. Rear door power window regulator
Repair procedures
Replacement
1.
Remove the rear door window glass.
(Refer to Rear Door - "Rear Door Window Glass ...
┬® 2017-2026 www.hcrmangs.com
