Hyundai Creta: Driveshaft Assembly / Front Driveshaft
Components and components location
| Components |
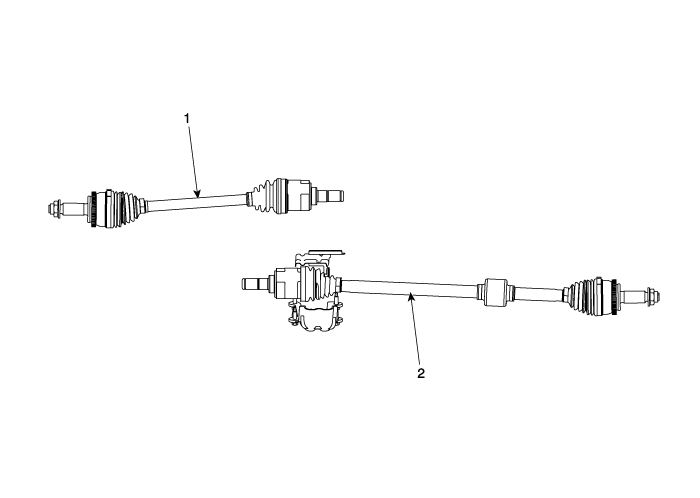
| 1. Driveshaft LH |
2. Driveshaft RH |
| Components |
| [RH] |
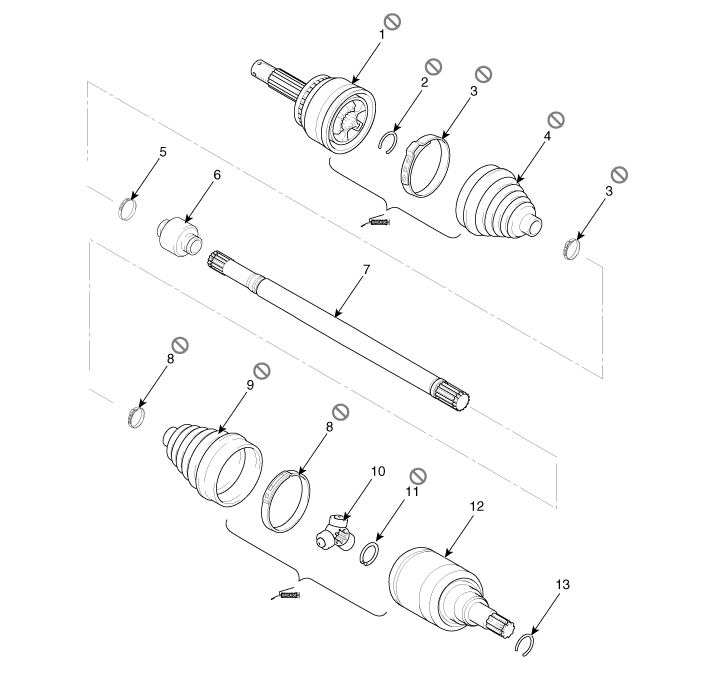
| 1. BJ assembly 2. Clip 3. BJ boot band 4. BJ boot 5. Dynamic damper band 6. Dynamic damper 7. Shaft |
8. TJ boot band 9. TJ boot 10. Spider assembly 11. Circlip 12. TJ housing 13. Circlip |
| [LH] |
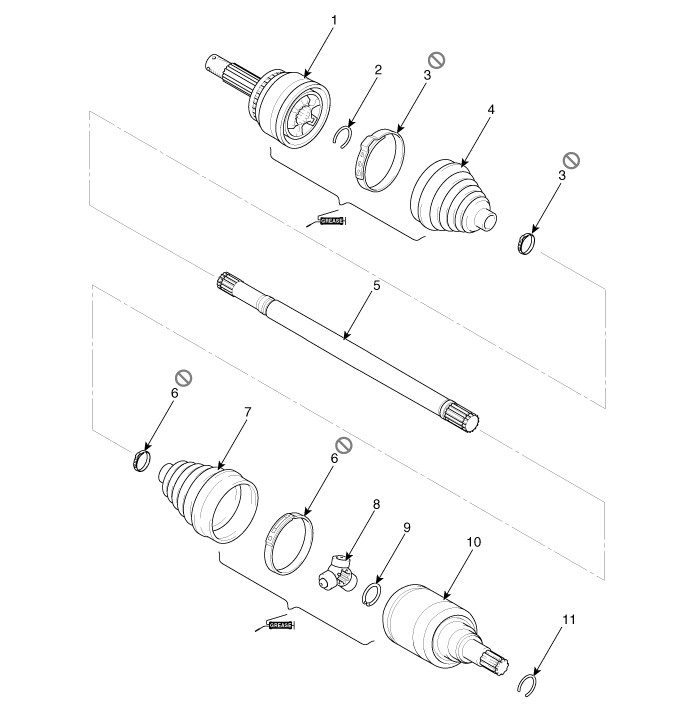
| 1. BJ assembly 2. BJ circlip 3. BJ boot band 4. BJ boot |
5. Shaft 6. TJ boot band 7. TJ boot 8. Spider assembly |
9. Snap ring 10. TJ case 11. Snap ring |
Repair procedures
| Removal |
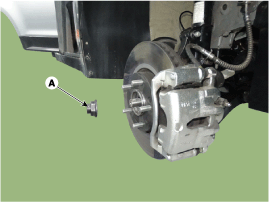
| 1. |
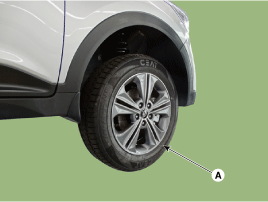
Remove the front wheel and tire (A) from front hub.
|

| 2. |
Remove the caulking nut (A).
|
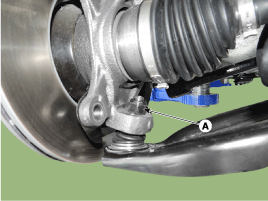
| 3. |
Remove the tie rod end ball joint.
|
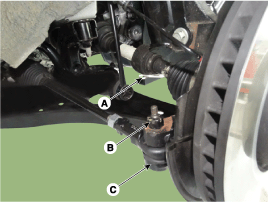
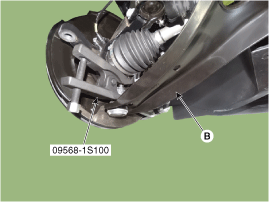
| 4. |
Remove the lower arm (B) from the knuckle by loosening the mounting
nut (A).
|
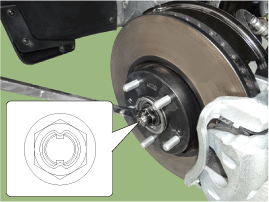
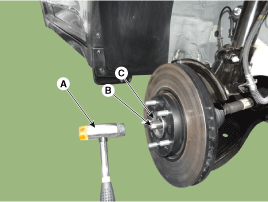
| 5. |
Using a plastic hammer (A), disconnect driveshaft (B) from the axle
hub (C).
|
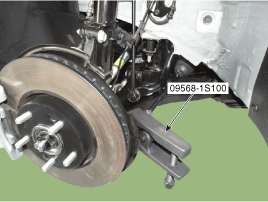
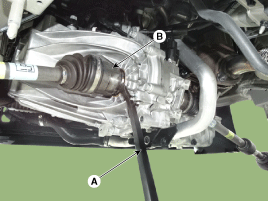
| 6. |
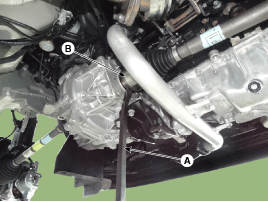
Insert a pry bar (A) between the transaxle case and joint case, and
separate the drive shaft (B) from the transaxle case.
[LH]
[RH]
|
| 7. |
Install in the reverse order of removal.
|
| 8. |
Check the front alignment.
(Refer to Suspension System - "Alignment")
|

 TJ Joint
Components and components location
Components
[LH]
1. BJ assembly
2. BJ circlip
3. BJ boot band
4. BJ boot
5. Shaft
6. TJ boot ...
Other information:
Hyundai Creta GS 2014-2019 Owners Manual: Cruise Control Operation
1. CRUISE indicator
2. SET indicator
The Cruise Control system allows
you to drive at speeds above 40
km/h (25 mph) without depressing
the accelerator pedal.
WARNING
Take the following precautions:
If the Cruise Control is left on,
(CRUISE indicator light in the
instrument clu ...
Hyundai Creta GS 2014-2019 Service Manual: Immobilizer Control Unit: Repair procedures
Removal
1.
Disconnect the negative (-) battery terminal.
2.
Remove the crash pad lower panel.
(Refer to Body - "Crash Pad Lower Panel")
3.
Disconnect the connector of the immobilizer unit and ...
