Hyundai Creta: Hood / Hood Assembly
Components and components location
| Component Location |
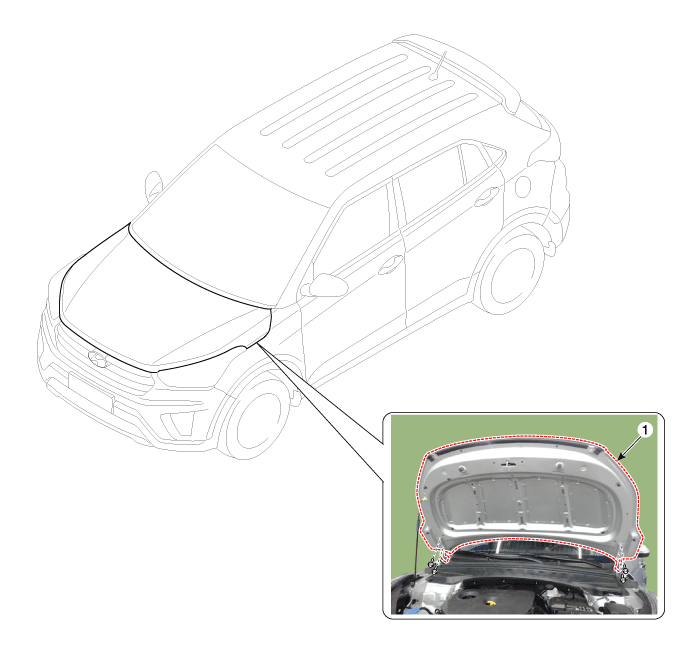
| 1. Hood assembly |
Repair procedures
| Replacement |
|

|

| 1. |
After loosening the hood hinge (B) mounting bolts, remove the hood assembly
(A).
|
| 2. |
To install, reverse the removal procedure.
|
 Repair procedures
Adjustment
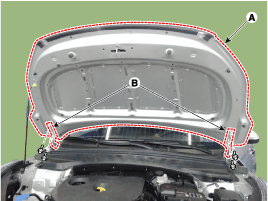
1.
After loosening the hinge (A) mounting bolt, adjust the hood (B) by
moving it up or down, or right or left.
2.
Adjust th ...
 Hood Seal Weatherstrip: Repair procedures
Replacement
1.
Detach the clips, then remove the hood seal weatherstrip (A).
...
Other information:
Hyundai Creta GS 2014-2019 Service Manual: BJ Boot
Components and components location
Components
1. BJ
assembly
2. BJ circlip
3. BJ boot band
4. BJ boot
5. Dynamic
damper band
6. Dynamic damper
7. Shaft
8. TJ boot band
9. TJ
boot
10. Spider assembly
11. Retainer ring
...
Hyundai Creta GS 2014-2019 Service Manual: Engine Coolant Temperature Sensor (ECTS)
Description and operation
Description
Engine Coolant Temperature Sensor (ECTS) is located in the engine coolant passage
of the cylinder head for detecting the engine coolant temperature. The ECTS
uses a thermistor whose resistance changes with the temperature.
The electric ...
© 2017-2026 www.hcrmangs.com
