Hyundai Creta: Crash Pad / Main Crash Pad Assembly
Hyundai Creta GS 2014-2019 Service Manual / Body (Interior and Exterior) / Crash Pad / Main Crash Pad Assembly
Components and components location
| Component Location |
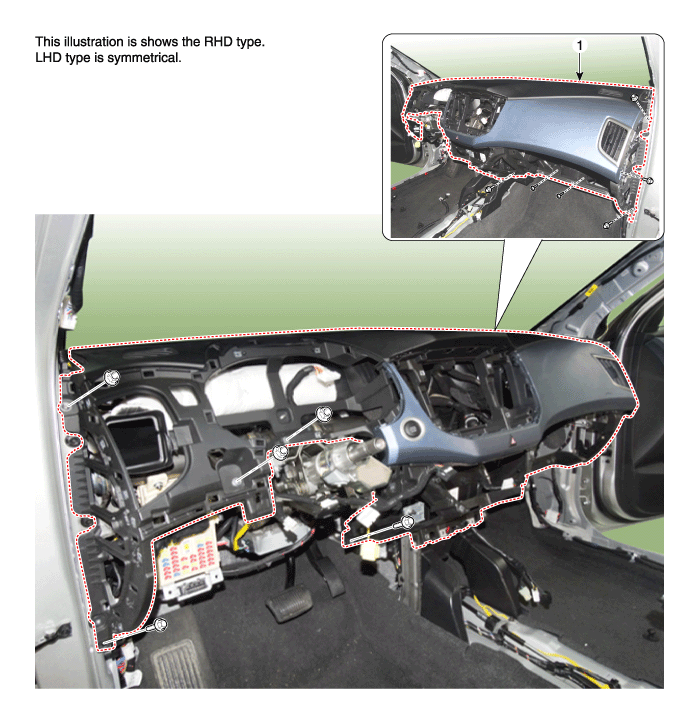
| 1. Main crash pad assembly |
Repair procedures
| Replacement |
|

|

| 1. |
Disconnect the negative (-) battery terminal.
|
| 2. |
Remove the front pillar trim.
(Refer to Interior Trim - "Front Pillar Trim")
|
| 3. |
Remove the cowl side trim.
(Refer to Interior Trim - "Cowl Side Trim")
|
| 4. |
Remove the audio unit.
(Refer to Body Electrical System - "Audio Unit")
|
| 5. |
Remove the crash pad lower panel.
(Refer to Crash Pad - "Crash Pad Lower Panel")
|
| 6. |
Remove the glove box housing.
(Refer to Crash Pad - "Glove Box Housing")
|
| 7. |
Remove the steering column shroud lower panel.
(Refer to Crash Pad - "Steering Column Shroud Panel")
|
| 8. |
Remove the steering wheel.
(Refer to Steering System - "Steering Wheel")
|
| 9. |
Remove the multifunction switch assembly.
(Refer to Body Electrical System - "Multifunction Switch")
|
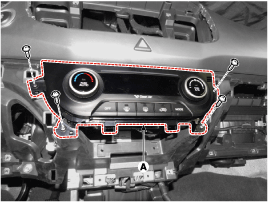
| 10. |
After loosening the mounting screws, then remove the heater & A/C controller
(A).
|
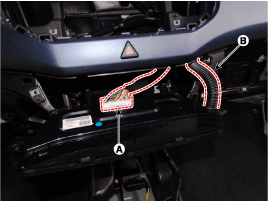
| 11. |
Disconnect the connectors (A) and hose (B).
|
| 12. |
Disconnect the hazard switch connector (A).
|
| 13. |
Disconnect the photo sensor connector (A).
|
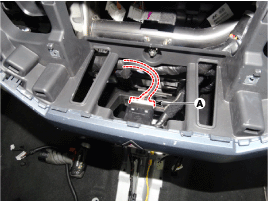
| 14. |
Loosen the mounting nuts.
|
| 15. |
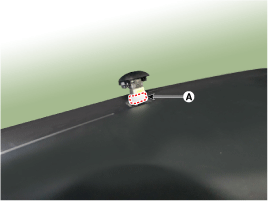
After loosening the mounting screws, then remove the crash pad garnish
[LH] (A).
|
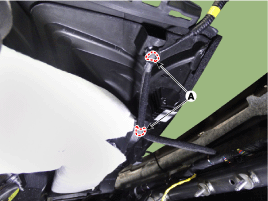
| 16. |
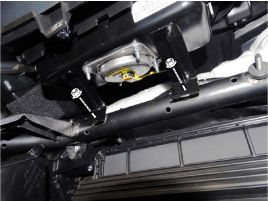
After loosening the mounting bolts and nuts, then remove the main crash
pad assembly (A).
|

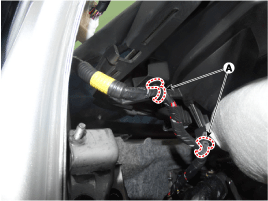
| 17. |
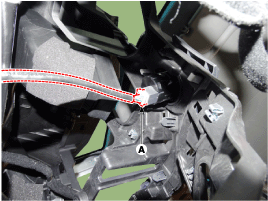
Disconnect the start button connector (A).
|
| 18. |
Disconnect the passenger's airbag connectors (A).
|
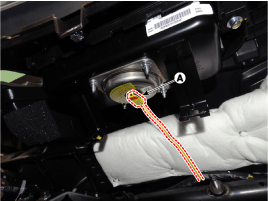
| 19. |
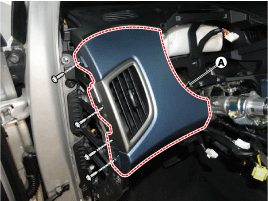
Right before removing the main crash pad, slightly lift the main crash
pad and remove the twitter speaker connector mounting clips (A) located
at the end of both side.
[LH]
[RH]
|
| 20. |
To install, reverse the removal procedure.
|
 Crash Pad Side Cover
Components and components location
Component Location
[LH]
1. Crash pad side cover [LH]
[RH]
1. Crash pad s ...
 Cowl Cross Bar Assembly
Components and components location
Component Location
1. Cowl cross bar assembly
Repair procedures
Replacement
...
Other information:
Hyundai Creta GS 2014-2019 Service Manual: Components and components location
Component Location
1. BCM (Body Control Module)
2. Ultrasonic sensor
※ Rear parking assist control
unit function is built in BCM (body control unit).
...
Hyundai Creta GS 2014-2019 Service Manual: Sunvisor
Components and components location
Component Location
1. Sunvisor
2. Retainer
Repair procedures
Replacement
•
Put on gloves to protect ...
© 2017-2026 www.hcrmangs.com
