Hyundai Creta: Rear Bumper / Rear Bumper beam Assembly
Components and components location
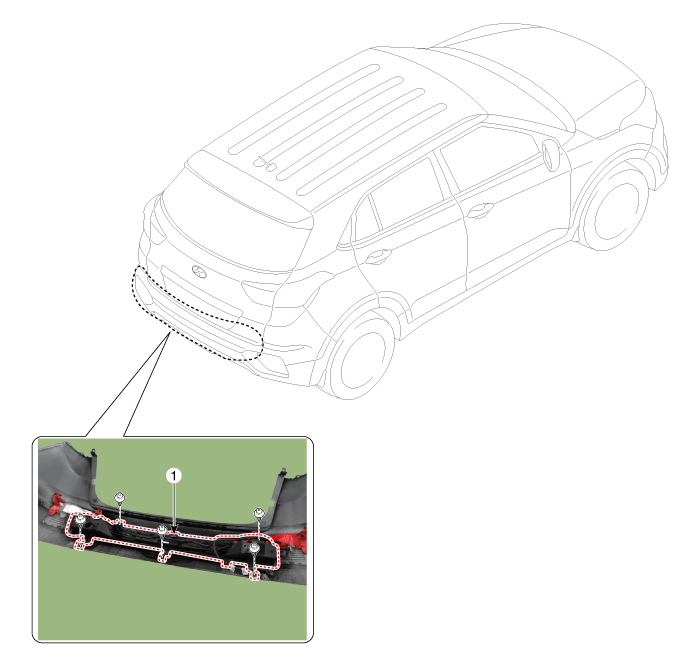
1. Rear bumper beam assembly
|
|
Repair procedures
| • |
Put on gloves to protect your hands.
|
|
| • |
When prying with a flat-tip screwdriver or use a prying trim
tool, wrap it with protective tape, and apply protective tape
around the related parts, to prevent damage.
|
| • |
Use a plastic panel removal tool to remove interior trim pieces
to protect from marring the surface.
|
| • |
Take care not to bend or scratch the trim and panels.
|
|
| 1. |
Remove the rear bumper cover.
(Refer to Rear Bumper - "Rear Bumper Cover")
|
| 2. |
Disconnect the rear bumper beam mounting wiring harness.
|
| 3. |
After loosening the mounting screws and clips, then remove the rear
bumper beam assembly (A).
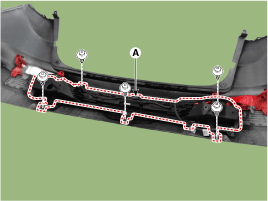
|
| 4. |
To install, reverse the removal procedure.
| •
|
Make sure the connector is plugged in properly.
|
| •
|
Replace any damaged clips.
|
|
|
Components and components location
Component Location
1. Rear bumper cover
Repair procedures
Replacement
&n ...
Other information:
Hyundai Creta GS 2014-2019 Owners Manual: Checking the coolant level
WARNING
Removing radiator cap
Never attempt to
remove the radiator cap while
the engine is operating or hot.
Doing so might lead to cooling
system and engine damage and
could result in serious personal
injury from escaping hot coolant
or steam.
Turn the engine off and ...
Hyundai Creta GS 2014-2019 Owners Manual: For best battery service
Keep the battery securely mounted.
Keep the battery top clean and dry.
Keep the terminals and connections
clean, tight, and coated with
gasolineeum jelly or terminal
grease.
Rinse any spilled electrolyte from
the battery immediately with a
solution of water and baking soda. ...



 Rear Bumper Cover
 Front Seat