Hyundai Creta: Rear Axle Assembly / Rear Hub - Carrier
Hyundai Creta GS 2014-2019 Service Manual / Driveshaft and axle / Rear Axle Assembly / Rear Hub - Carrier
Components and components location
| Components |
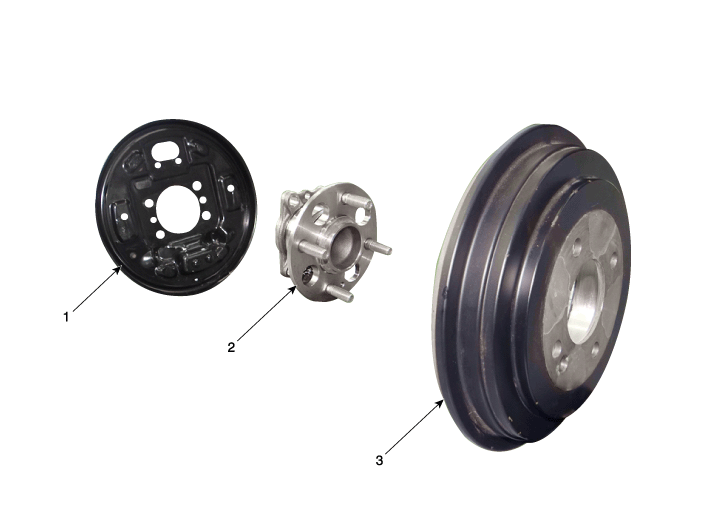
| 1. Dust cover 2. Rear hub assembly |
3. Rear brake disc |
Repair procedures
| Removal |
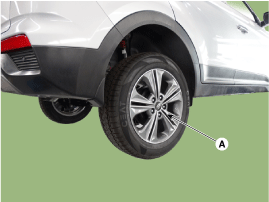
| 1. |
Loosen the wheel nuts slightly. Raise the vehicle, and make sure it
is securely supported.
|
| 2. |
Remove the rear wheel and tire (A).
|

| 3. |
Loosen the screw and then remove the drum.
|
| 4. |
Disconnect the rear wheel speed sensor connector.
|
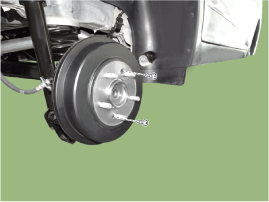
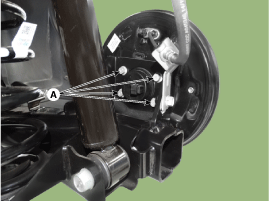
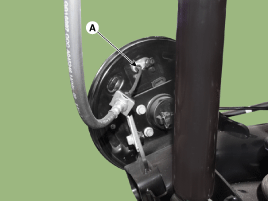
| 5. |
Loosen the hub mounting bolts (A) and then remove the hub from the torsion
beam.
|
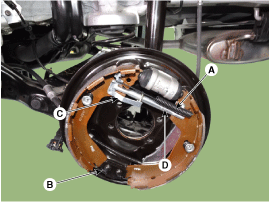
| 6. |
Remove the upper shoe return spring (A), lower shoe return spring (B),
level pawl (C) and djuster assembly (D).
|
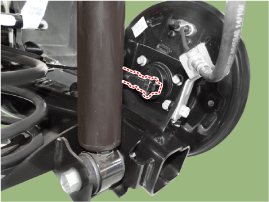
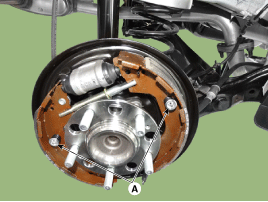
| 7. |
Remove the shoe hold assembly (A) and then remove the brake shoe.
|
| 8. |
Disconnect the parking cable.
|
| 9. |
Disconnect the brake fluid tube Flare nut (A).
|
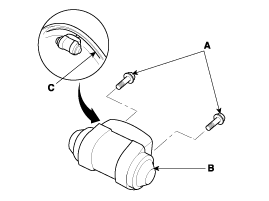
| 10. |
Loosen the mounting bolts (A) and then remove the wheel cylinder (B)
from the backing plate (C).
|
| 11. |
Install in the reverse order of removal.
|
| 12. |
After installation, bleed the brake system.
(Refer to Brake System - "ESC System Bleeding")
|
| Inspection |
| 1. |
Check the hub for cracks and the splines for wear.
|
| 2. |
Check the rear axle carrier for cracks.
|


Other information:
Hyundai Creta GS 2014-2019 Owners Manual: LCD display
LCD display control
The LCD display modes can be
changed by using the control switches.
(1) /
: Changing LCD modes
(2) â–˛, â–Ľ : Changing items for each
LCD modes
(3) OK / RESET : Selecting or resetting
items
LCD modes
Cannot edit settings while driving
This warning message a ...
Hyundai Creta GS 2014-2019 Service Manual: Specifications
Specifications
Items
Specifications
Rated voltage
DC 12V
Operating voltage
DC 9 ~ 16V
Operating temperature
-30°C ~ 75°C (-4°F ~ 158°F)
Dark current
...
© 2017-2026 www.hcrmangs.com
