Hyundai Creta: Rear Suspension System / Rear Shock Absorber
Hyundai Creta GS 2014-2019 Service Manual / Suspension System / Rear Suspension System / Rear Shock Absorber
Components and components location
| Components |
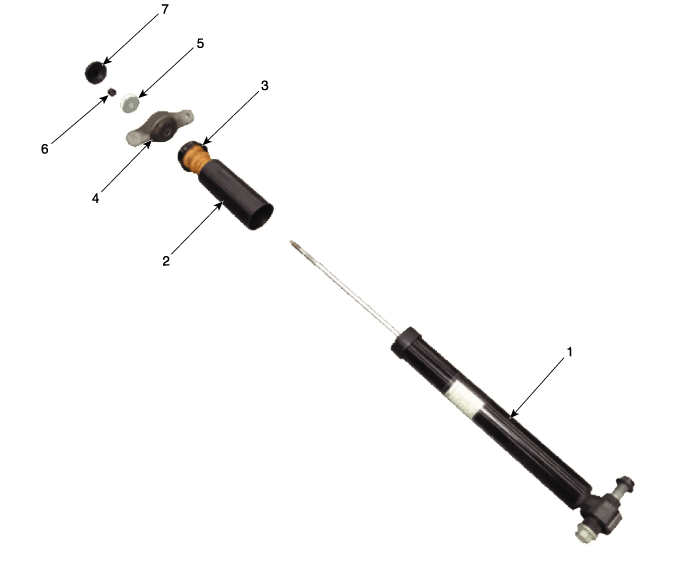
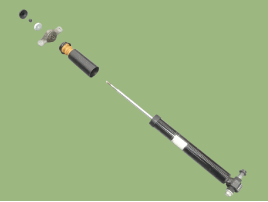
| 1. Shock absorber 2. Dust cover 3. Bumper rubber 4. Insulator assembly |
5. Washer 6. Lock nut 7. Insulator cover |
Repair procedures
| Removal |
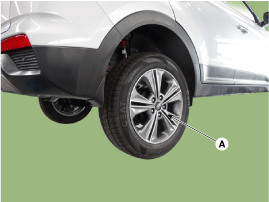
| 1. |
Loosen the wheel nuts slightly.
Raise the vehicle, and make sure it is securely supported.
|
| 2. |
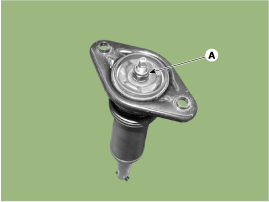
Remove the rear wheel and tire (A).
|

| 3. |
Loosen the rear shock absorber (A) upper mounting bolt.
|
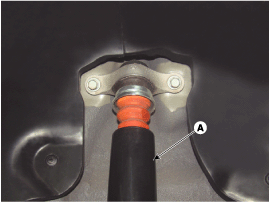
| 4. |
Loosen the bolt and then remove the rear shock absorber (A) from the
torsion beam axle.
|
| 5. |
Install in the reverse order of removal.
|
| Disassembly |
| 1. |
Loosen the lock nut (A) and then disassembly the shock absorber.
|
| 2. |
Separate the shock absorber as below illustration.
|
| Inspection |
| 1. |
Check the rubber parts for wear and deterioration.
|
| 2. |
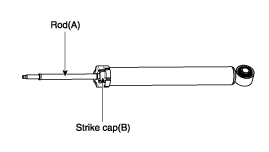
Compress and extend the piston rod (A) and check that there is no abnormal
resistance or unusual sound during operation.
|
| Disposal |
| 3. |
Remove the strike cap (B) from the shock absorber assembly.
|
| 4. |
Remove the gas by Drilling a hole in the inner oil seal.
|
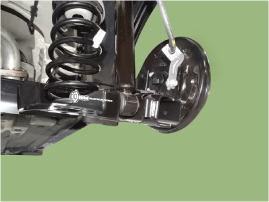
 Components and components location
Components Location
1. Torsion beam axle
2. Shock absorber
3. Coil spring assembly
...
 Rear Coil Spring
Components and components location
Components
1. Spring lower pad
2. Spring
3. Spring upper pad
Repair procedures
Removal
1.
...
Other information:
Hyundai Creta GS 2014-2019 Service Manual: Rear Wheel Guard: Repair procedures
Replacement
ŌĆó
Put on gloves to protect your hands.
ŌĆó
When ...
Hyundai Creta GS 2014-2019 Service Manual: Driver Airbag (DAB) Module and Clock Spring
Description and operation
Description
Driver Airbag (DAB) is installed in the steering wheel and electrically connected
to SRSCM via the clock spring. It protects the driver by deploying the airbag
when frontal crash occurs. The SRSCM determines deployment of the Driver Airbag ...
┬® 2017-2026 www.hcrmangs.com
