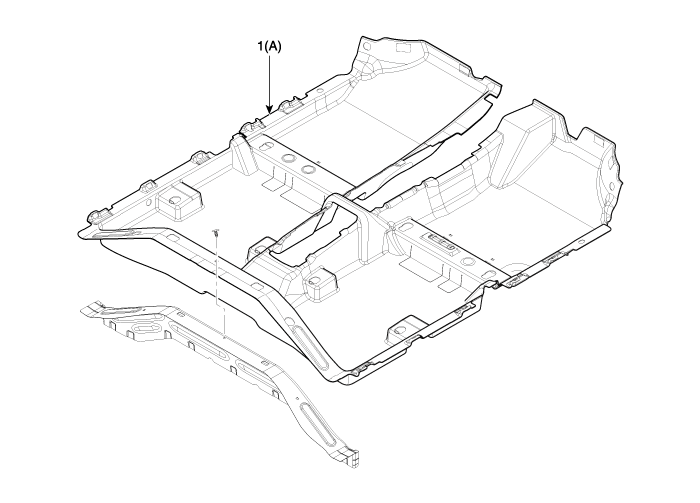
Hyundai Creta: Floor Carpet / Repair procedures
Hyundai Creta GS 2014-2026 Service Manual / Body (Interior and Exterior) / Floor Carpet / Repair procedures
| Replacement |
|
|
| 1. |
Remove the front seat assembly.
(Refer to Front Seat - "Front Seat Assembly")
|
| 2. |
Remove the rear seat cushion assembly.
(Refer to Rear Seat - "Rear Seat Assembly")
|
| 3. |
Slighty remove the front door body side weatherstrip.
|
| 4. |
Slighty remove the rear door body side weatherstrip.
|
| 5. |
Remove the front door scuff trim.
(Refer to Interior Trim - "Front Door Scuff Trim")
|
| 6. |
Remove the rear door scuff trim.
(Refer to Interior Trim - "Rear Door Scuff Trim")
|
| 7. |
Remove the center pillar lower trim.
(Refer to Interior Trim - "Center Pillar Trim")
|
| 8. |
Remove the cowl side trim.
(Refer to Interior Trim - "Cowl Side Trim")
|
| 9. |
Remove the luggage side trim.
(Refer to Interior Trim - "Luggage Side Trim")
|
| 10. |
Remove the floor console assembly.
(Refer to Floor Console - "Floor Console Assembly")
|
| 11. |
Remove the floor carpet assembly (A).
|
| 12. |
To install, reverse the removal procedure.
|
 Floor Carpet
...
 Front Bumper
...
Other information:
Hyundai Creta GS 2014-2026 Service Manual: Components and components location
Component Location
1. BCM (Body Control Module)
2. Ultrasonic sensor
※ Rear parking assist control
unit function is built in BCM (body control unit).
...
Hyundai Creta GS 2014-2026 Service Manual: Variable Intake Solenoid(VIS) Actuator: Repair procedures
Removal and Installation
1.
Disconnect the battery negative terminal.
2.
Remove the air cleaner assembly.
(Refer to Intake and Exhaust System - "Air Cleaner")
3.
Disconnect the lever (A) a ...
© 2017-2026 www.hcrmangs.com


