Hyundai Creta: Audio / Speakers: Repair procedures
Hyundai Creta GS 2014-2025 Service Manual / Body Electrical System / Audio / Speakers: Repair procedures
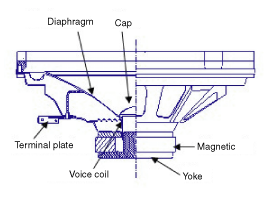
| Inspection |
| 1. |
Troubleshooting for Speaker
|


| Removal |
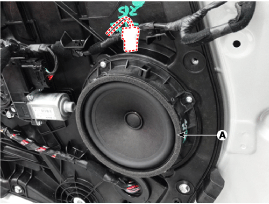
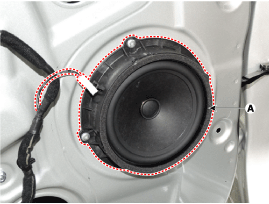
Front Speaker
| 1. |
Remove the front door trim.
(Refer to Body - "Front Door Trim")
|
| 2. |
Remove the rear speaker (A) after removing 4 rivets.
|
Rear Speaker
| 1. |
Remove the rear door trim.
(Refer to Body - "Rear Door Trim")
|
| 2. |
Remove the rear speaker (A) after removing 4 rivets.
|
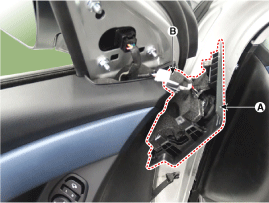
Tweeter Speaker (Front)
| 1. |
Using a screwdriver or remover, remove the front door quadrant inner
cover (A).
|
| 2. |
Disconnect the tweeter speaker connector (B).
|
| Installation |
Front Speaker
| 1. |
Install the front speaker.
|
| 2. |
Install the front door trim.
|
Rear Speaker
| 1. |
Install the rear speaker.
|
| 2. |
Install the rear door trim.
|
Tweeter Speaker (Front)
| 1. |
Connect the connector.
|
| 2. |
Install the tweeter speaker and front door quadrant inner cover
|
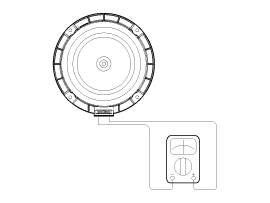
 Audio Unit
Components and components location
Components
[Radio/CD/MP3]
Connector Pin Information
No
Connector A
Connector B
...
 Antenna
Components and components location
Components
[Roof Antenna (AM/FM)
for Audio head unit]
Repair procedures
Inspection
Antenna Cable
1.
...
Other information:
Hyundai Creta GS 2014-2025 Service Manual: Fuel Sender: Repair procedures
Removal
1.
Remove the fuel pump.
(Refer to Fuel Delivery System - "Fuel Pump")
2.
Disconnect the fuel sender connector (A).
3.
Remove the fuel sender (A) after releasing the fix hook. ...
Hyundai Creta GS 2014-2025 Owners Manual: Storage compartment
WARNING
Flammable materials
Do not store cigarette lighters,
propane cylinders, or other flammable/
explosive materials in the
vehicle. These items may catch
fire and/or explode if the vehicle is
exposed to hot temperatures for
extended periods.
WARNING
ALWAYS keep the storage compar ...
© 2017-2025 www.hcrmangs.com
