Hyundai Creta: Electric Power Steering / Steering Gear box
Components and components location
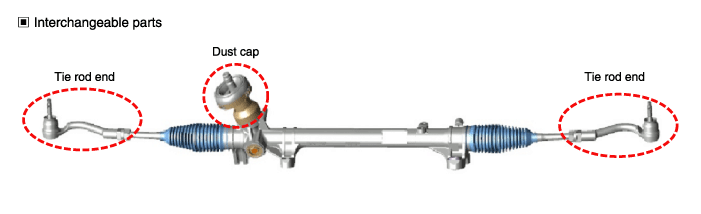
| Components |
| [LHD] |
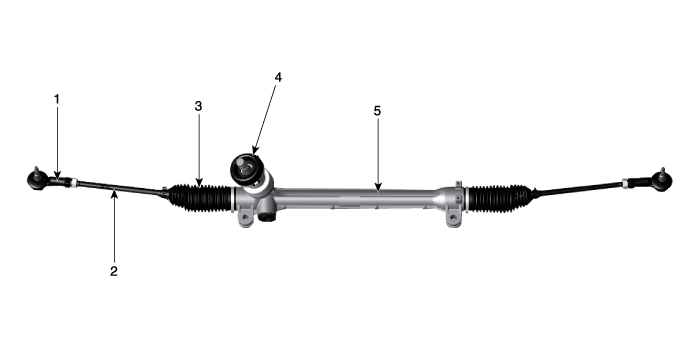
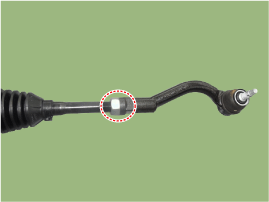
| 1. Tie
rod end 2. Tie rod 3. Bellows |
4. Dust
cap 5. Steering geer box |
| [RHD] |
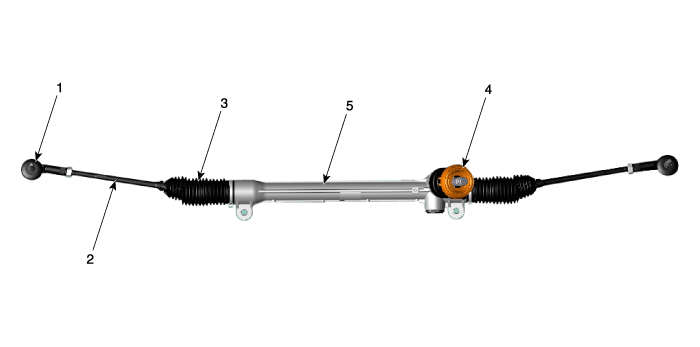
| 1. Tie
rod end 2. Tie rod 3. Bellows |
4. Dust
cap 5. Steering geer box |
Repair procedures
| Removal |
| 1. |
Remove the front wheel & tire.
|
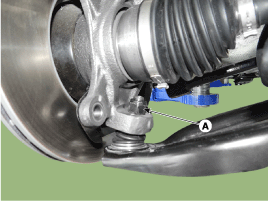
| 2. |
Separate the stabilizer link (B) from the front strut assembly (A) after
loosening the nut.
|
| 3. |
Remove the tie rod end ball joint.
|
| 4. |
Remove the lower arm (B) from the knuckle by loosening the mounting
nut (A).
|
| 5. |
Loosen the universal joint bolt (A) and then disconnect the universal
joint assembly.
|

| 6. |
Remove the rubber hanger (A).
|
| 7. |
Remove the cross member from the body by loosening the roll rod (A)
mounting bolts and nuts.
|
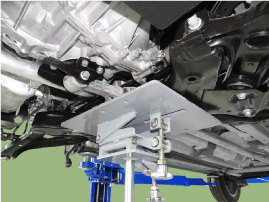
| 8. |
Set the jack under the front sub frame for safety.
|
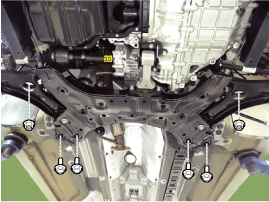
| 9. |
Loosen the mounting bolts & nuts then remove the front sub frame.
|
| 10. |
Remove stabilizer bar (A) from the front sub frame by loosening the
mounting bolts & nuts. [LHD only]
|

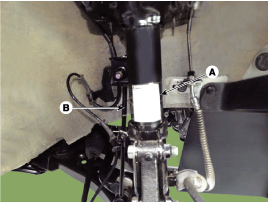
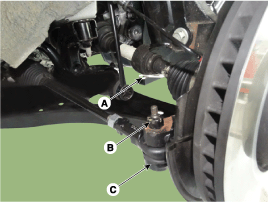
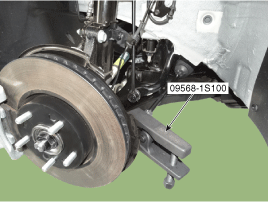
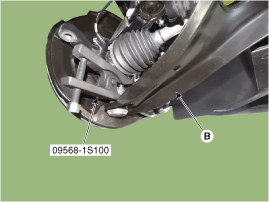
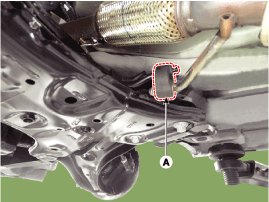
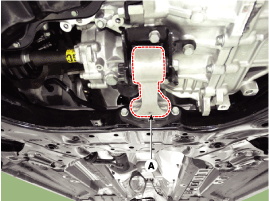
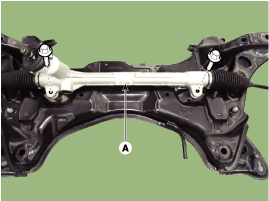
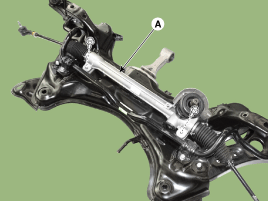
| 11. |
Remove steering gearbox (A) from the front sub frame by loosening the
mounting bolts.
[LHD]
[RHD]
|
| 12. |
Install in the reverse order of removal.
|
| Replacement |
|
| 1. |
Remove the tie rod end after loosening the nut.
|
| 2. |
Replace with new parts.
|
| 3. |
Check the alignment.
(Refer to Tires/Wheels - "Alignment")
|
| 1. |
Remove the dust cap cover.
|
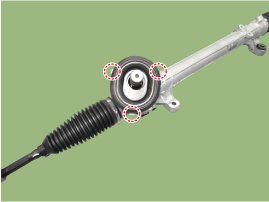
| 2. |
Pull the upwards and remove the dust cap.
|
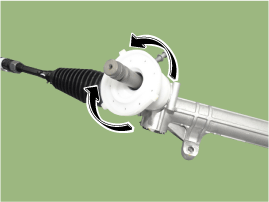
| 3. |
Installation is the reverse of removal.
|
 Steering Column and Shaft
Components and components location
Components
1. Steering
column
2. Motor
3. ECU
4. Steering gear box
Repair procedures
Removal
...
 Restraint
...
Other information:
Hyundai Creta GS 2014-2019 Owners Manual: Engine Start/Stop button
Whenever the front door is opened,
the Engine Start/Stop button will illuminate
and will go off 30 seconds
after the door is closed. (if equipped)
WARNING
To reduce risk of serious injury or
death, NEVER allow children or
any person who is unfamiliar with
the vehicle to touch the Eng ...
Hyundai Creta GS 2014-2019 Owners Manual: Highway driving
Tires
Adjust the tire inflation, as specified.
Under-inflation may overheat or
damage the tires.
Do not install worn-out or damaged
tires, which may reduce traction or
fail the braking operation.
Information
Never over-inflate your tires above the
maximum inflation pressure, as specifi ...
