Hyundai Creta: Brake System / Stop Lamp Switch
Components and components location
| Components Location |
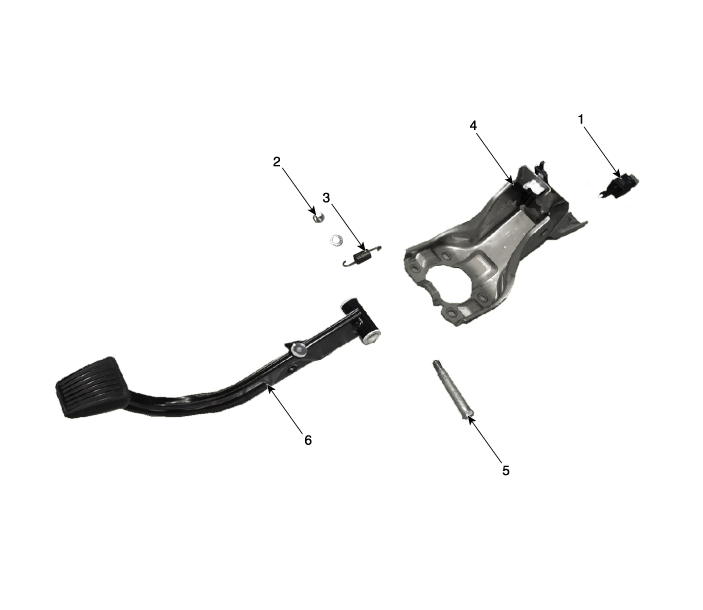
| 1.Stop lamp switch 2. Nut 3. Return spring |
4. Brake pedal member assembly 5. Bolt 6. Brake pedal arm |
Description and operation
| Description |
The stop lamp switch plays the role of supplying signals to turn on stop lamps
and convenience devices (HECU,ECU,BCM,SMK etc.) for drivers as a system that
expresses the driver's intentions to brake by pressing the brake pedal.
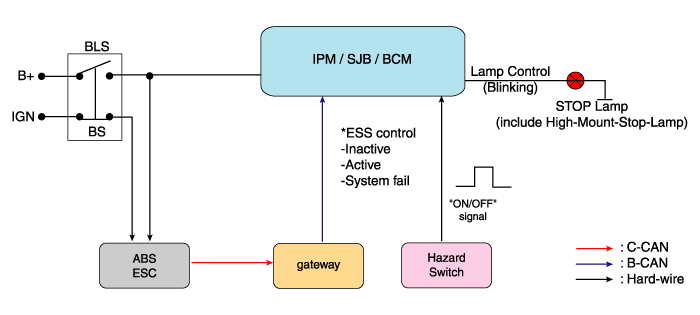
Schematic diagrams
| Schematic Diagram |
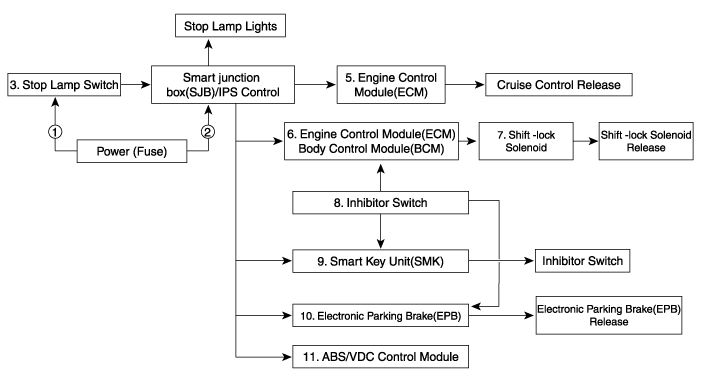
| System circuit diagram |
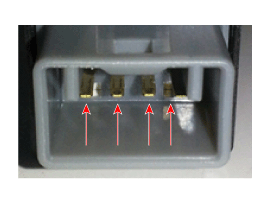
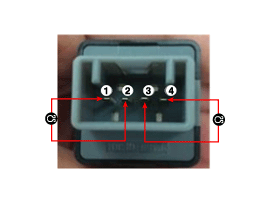
| Terminal function |

|
Teminal |
Description |
|
1 |
IGN1 |
|
2 |
Engine Control Module (ECM) |
|
3 |
B+ |
|
4 |
Stop Lmap |
Troubleshooting
| Troubleshooting |
| 1. |
Part diagnosis
|
| 2. |
Symptom diagnosis
|
| 3. |
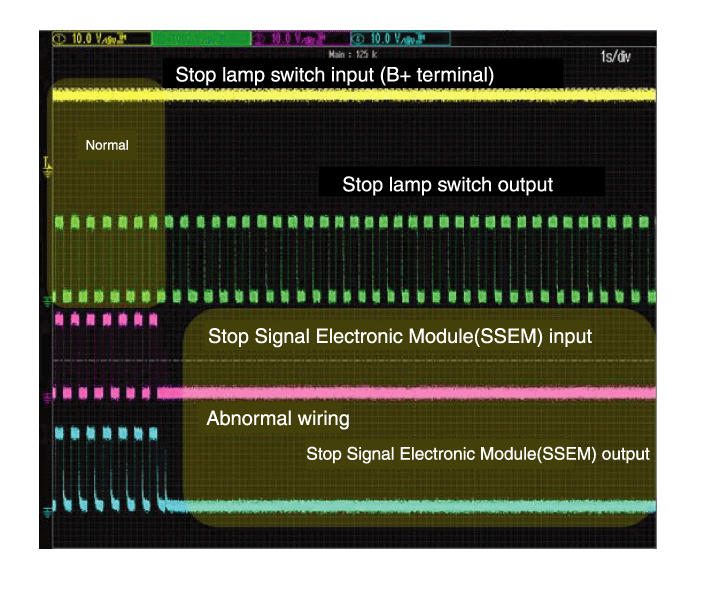
Stop lamp switch system diagnosis
SSEM : Stop Signal Electronic Module
|
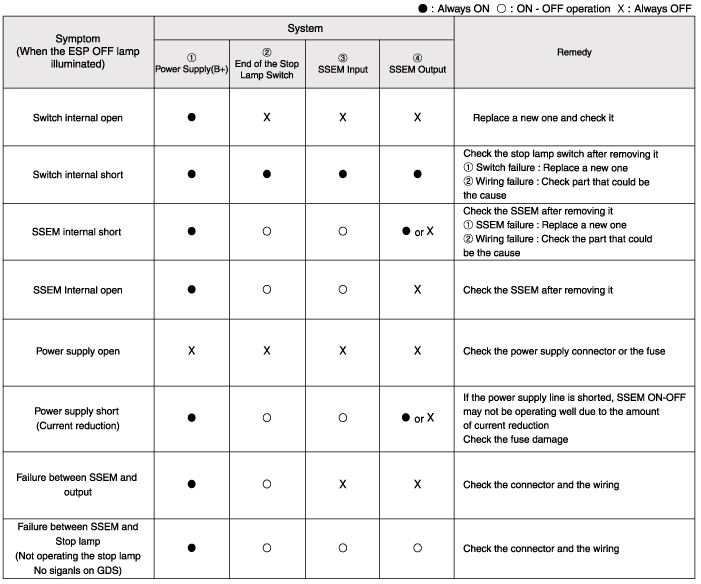
| 4. |
Refer to DTC guide when the related DTC codes are displayed.
|
Repair procedures
| Adjustment |
| 1. |
Turn ignition switch OFF and disconnect the negative (-) battery cable.
|
| 2. |
Remove the lower crash pad.
(Refer to Body - "Crash Pad")
|
| 3. |
Remove the knee airbag.
(Refer to Rstraint - "Air Bag Module")
|
| 4. |
Confirm the gap between stop lamp switch and bracket.
|
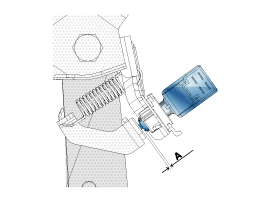
| 5. |
If the gap between stop lamp switch and bracket is not 1.0~2.0mm(0.04~0.08in),
check the mounting clip and other part of around stop lamp.
|
| 6. |
If there is normal, remove the stop lamp switch and then install again.
|
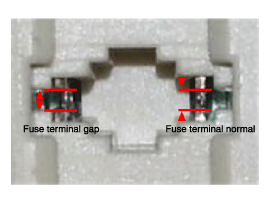
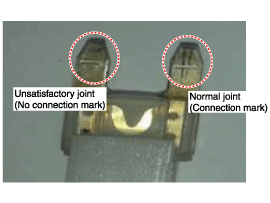
| Inspection |
1. Fuse inspection
Mount the test fuse to the switch fuse and relay fuse part to confirm a normal
joint fit.
2. GDS Data Analysis
| 1. |
Analyze GDS data and confirm if there is anything wrong with the stop
lamp switch.
|
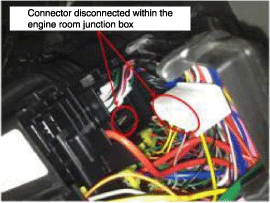
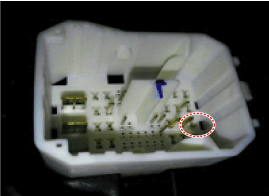
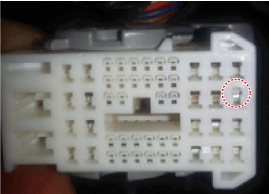
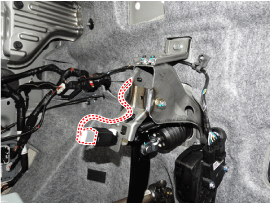
3. Inspection of connector by each part
Check to see whether or not each connector has been damaged, or terminal surge,
or incomplete connection has taken place
[Engine room junction box]
[Stop signal electronic module]
[ABS/VDC control module]
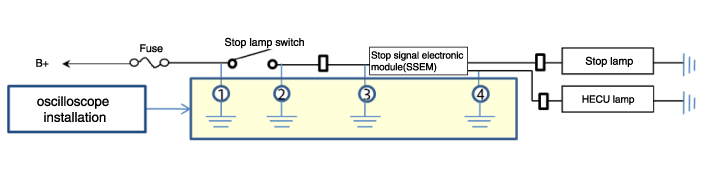
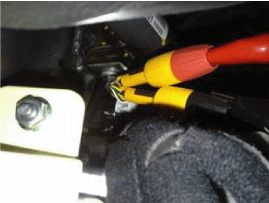
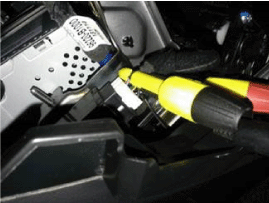
4. Inspect the stop lamp circuit
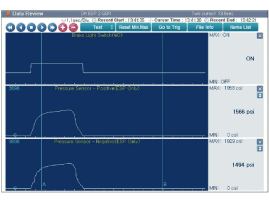
Connect probe to each terminal wire and confirm oscilloscope waveform.
[Stop lamp switch input/output]
[Stop signal electronic module input/output]
[Oscilloscope waveform screen]
| Removal |
| 1. |
Turn ignition switch OFF and disconnect the negative (-) battery cable.
|
| 2. |
Remove the lower crash pad.
(Refer to Body - "Crash Pad")
|
| 3. |
Remove the knee airbag.
(Refer to Rstraint - "Air Bag Module")
|
| 4. |
Disconnect the stop lamp switch connector (A).
|
| 5. |
Pull the locking plate (A) as indicated by the arrow.
|
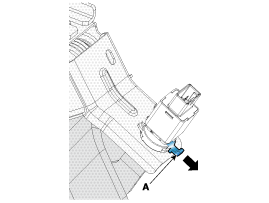
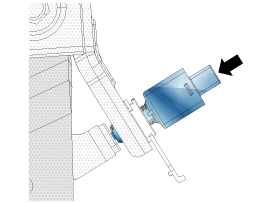
| 6. |
Turn stop lamp switch 45° counterclockwise and remove it.
|
| 7. |
Inspect a removed stop lamp switch along the below procedures.
|
| Installation |
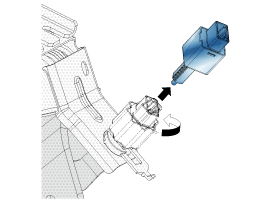
| 1. |
Fix the brake pedal arm and insert fully the stop lamp switch as hiding
contact part.
|
| 2. |
After inserting, turn the stop switch (A) 45° clockwise, and then assemble
locking plate (B) by pushing.
|

| 3. |
Confirm the gap between stop lamp switch and bracket.
|

| 4. |
Connect the stop lamp switch connector.
|
| 5. |
Install the knee air bag.
(Refer to Restraint - "Knee Airbag (KAB) Module")
|
| 6. |
Install the lower crash pad.
(Refer to Body - "Crash Pad")
|
 Rear Disc Brake
Components and components location
Components
1. Adjuster assembly
2. Upper return spring
3. Lever pawl
4. Shoe hold pin
5. Shoe hold spring
6. Shoe ho ...

Other information:
Hyundai Creta GS 2014-2019 Owners Manual: Cup holder
Cups or small beverage cans may be
placed in the cup holders.
WARNING
Avoid abrupt starting and braking
when the cup holder is in use
to prevent spilling your drink. If
hot liquid spills, you could be
burned. Such a burn to the driver
could cause loss of vehicle
control re ...
Hyundai Creta GS 2014-2019 Service Manual: Specifications
Specifications
Item
Specification
Type
Electric Power Steering System
Steering gear
Type
Rack & Pinion
Rack stroke
148 mm (5.83 in.) ± 1 (0.3937 in.)
...
© 2017-2026 www.hcrmangs.com
