Hyundai Creta: Tail Gate / Tail Gate Assembly
Hyundai Creta GS 2014-2019 Service Manual / Body (Interior and Exterior) / Tail Gate / Tail Gate Assembly
Components and components location
| Component Location |
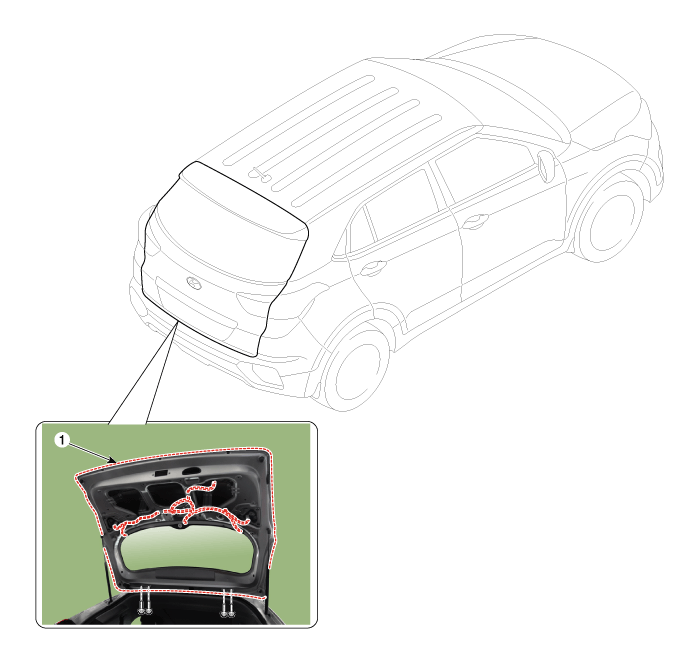
| 1. Tail gate assembly |
Repair procedures
| Replacement |
|

|

| 1. |
Remove the tail gate trim.
(Refer to Tail Gate - "Tail Gate Trim")
|
| 2. |
Remove the tail gate latch.
(Refer to Tail Gate - "Tail Gate Latch")
|
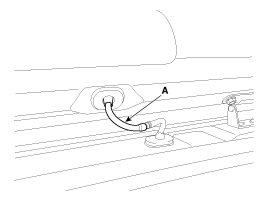
| 3. |
Disconnect the washer nozzle hose (A).
|
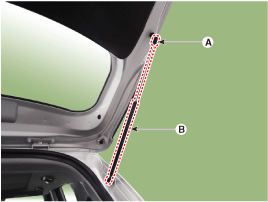
| 4. |
Using a screwdriver, lift the socket clips (A) up slightly on both ends
of the tail gate lifter (B).
|
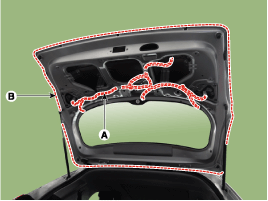
| 5. |
Disconnect the connectors and tail gate wiring harness (A).
|
| 6. |
After loosening the mounting bolts, then remove the tail gate assembly
(B).
|
| 7. |
To install, reverse the removal procedure.
|

 Repair procedures
Adjustment
1.
After loosening the tail gate hinge (A) mounting bolt, adjust the tail
gate by moving it up or down, or right or left.
2.
...
 Tail Gate Trim
Components and components location
Component Location
1. Tail gate trim
Repair procedures
Replacement
...
Other information:
Hyundai Creta GS 2014-2019 Owners Manual: Rear seats
Headrest
The rear seats are equipped with
headrests in all the seating positions
for the occupant's safety and comfort.
The headrest not only provides comfort
for passengers, but also helps to
protect the head and neck in the
event of a collision.
WARNING
To reduce the risk of se ...
Hyundai Creta GS 2014-2019 Owners Manual: Driving in the rain
Rain and wet roads can make driving
dangerous. Here are a few things to
consider when driving in the rain or
on slick pavement:
Slow down and allow extra following
distance. A heavy rainfall
makes it harder to see and increases
the distance needed to stop
your vehicle.
Replac ...
© 2017-2026 www.hcrmangs.com
