Hyundai Creta: Charging System / Alternator
Description and operation
| Description |
The Alternator has eight built-in diodes, each rectifying AC current to DC current.
Therefore, DC current appears at alternator "B" terminal.
In addition, the charging voltage of this alternator is regulated by the battery
voltage detection system.
The alternator is regulated by the battery voltage detection system.
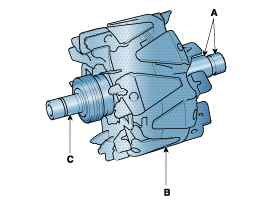
The main components of the alternator are the rotor, stator, rectifier, capacitor
brushes, bearings and V-ribbed belt pulley.
The brush holder contains a built-in electronic voltage regulator.
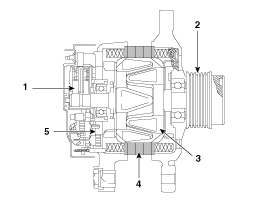
| 1. Brush 2. Drive belt pulley (OAD : Overrunning Alternator Decoupler) 3. Rotor 4. Stator 5. Rectifier |
Specifications
| Specification |
Alternator
|
Item |
Specification |
|
|
Rated voltage |
13.5V, 110A |
|
|
Speed in use |
1,000 ~ 18,000 rpm |
|
|
Voltage regulator |
IC Regulator built-in type |
|
|
Regulator Setting Voltage |
External mode |
Refer to below graph |
|
Internal mode |
14.55 ┬▒ 0.3V |
|
|
Temperature Gradient |
External mode |
0 ┬▒ 3 mV / ┬░C |
|
Internal mode |
-3.5 ┬▒ 2mV / ┬░C |
|
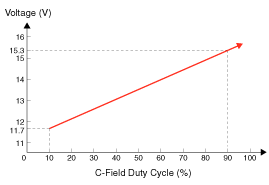
ÔÇ╗ Regulator Setting Voltage (External mode)
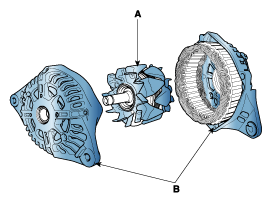
Components and components location
| Components |
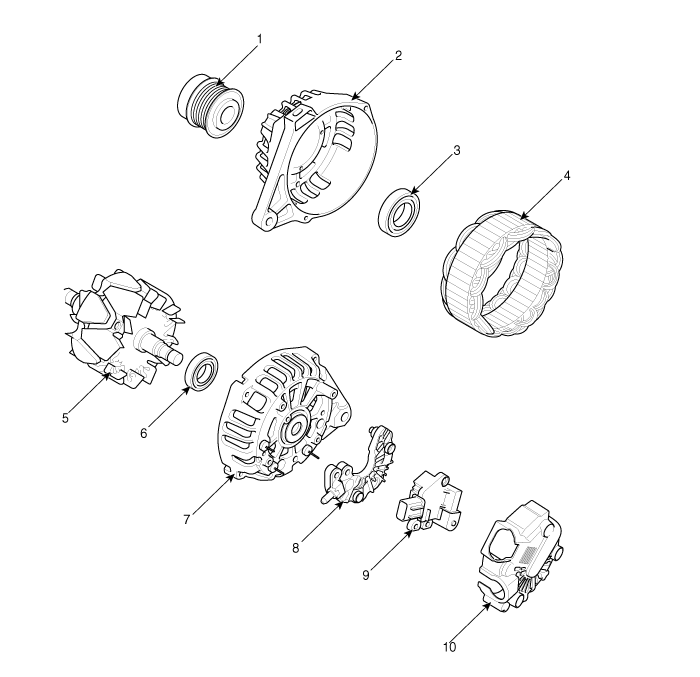
| 1. OAD
(Overrunning Alternator Decoupler) 2. Front Housing 3. Front Bearing 4. Stator 5. Rotor 6. Rear Bearing |
7. Rear
Housing 8. Rectifier Assembly 9. Regulator Assembly 10. Rear Cover |
Schematic diagrams
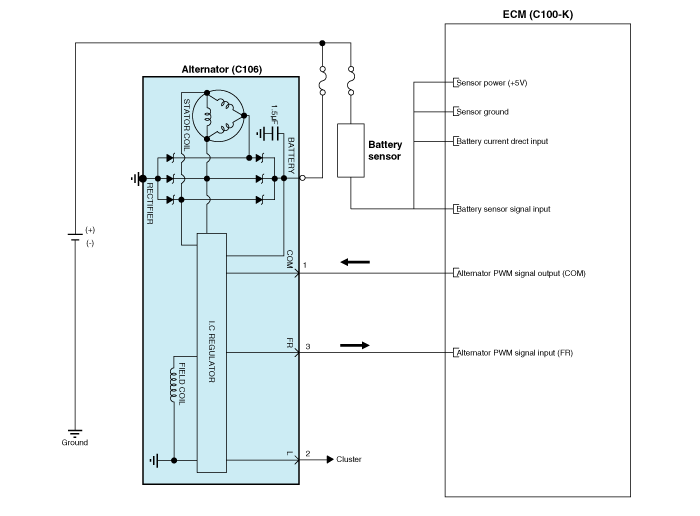
| Circuit Diagram |
Repair procedures
| Removal |
| 1. |
Disconnect the battery negative terminal.
|
| 2. |
Loosen the mounting bolts (A) and then, turn the adjusting bolt (B)
clockwise to loosen tension.
|
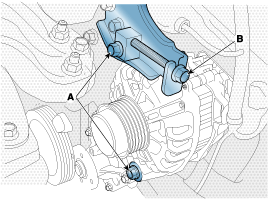
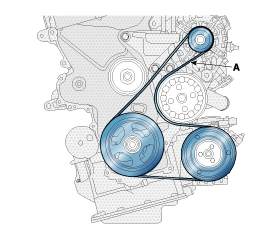
| 3. |
Remove the drive belt (A).
|
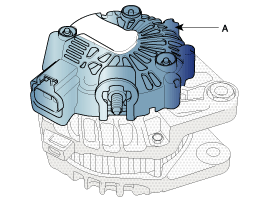
| 4. |
Disconnect the air compressor connector (A) and the alternator connector
(B), and remove the cable (C) from alternator "B" terminal.
|

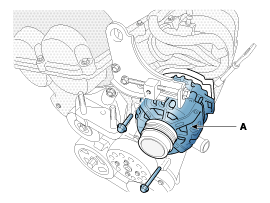
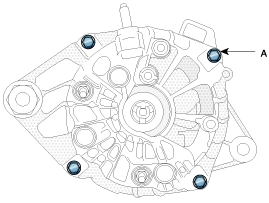
| 5. |
Remove the alternator (A).
|
| Installation |
| 1. |
Install in the reverse order of removal.
|
| 2. |
Adjust the alternator belt tension after installation.
(Refer to Engine Mechanical System - "Drive Belt")
|
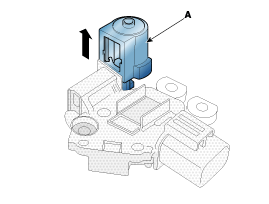
| Disassembly |
| 1. |
Remove the rear cover (A) after removing nuts.
|
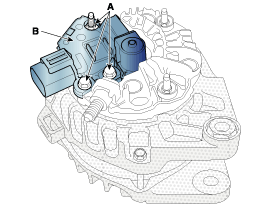
| 2. |
Remove the mounting bolts (A) and the brush holder assembly (B).
|
| 3. |
Remove the slip ring guide (A) after pulling it.
|
| 4. |
Remove the OAD (Overrunning Alternator Decoupler) cap.
|

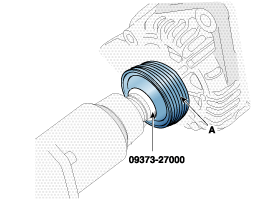
| 5. |
Remove the OAD(Overrunning Alternator Decoupler) pulley (A) using the
special tool.
|
| 6. |
Unsolder the 3 stator leads (A).
|

| 7. |
Remove the 4 through bolts (A).
|
| 8. |
Disconnect the rotor (A) and bracket (B).
|
| Reassembly |
| 1. |
Reassemble in the reverse order of disassembly.
|
|
| Inspection |
| [Rotor] |
| 1. |
Check that there is continuity between the slip rings (C).
|
| 2. |
Check that there is no continuity between the slip rings and the rotor
(B) or rotor shaft (A).
|
| 3. |
If the rotor fails either continuity check, replace the alternator.
|
| [Stator] |
| 4. |
Check that there is continuity between each pair of leads (A).
|
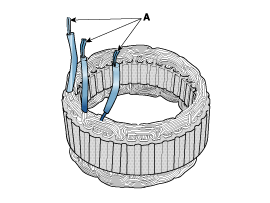
| 5. |
Check that there is no continuity between each lead and the coil core.
|
| 6. |
If the coil fails either continuity check, replace the alternator.
|
 Repair procedures
On-vehicle Inpection
ÔÇó
First of all, check for DTCs. If a DTC is present, perform tro ...
 Battery
Description and operation
Description
1.
The MF(Maintenance Free) battery is, as the name implies, totally maintenance
free and has no removable battery cell caps ...
Other information:
Hyundai Creta GS 2014-2019 Service Manual: Flow diagram
Power Flow Chart
P,N
UD/B
LR/B
26/B
35R/C
OD/C
OWC
ÔùÅ
Ôûú Direction of Rotation
ÔûÂLower & Reverse B ...
Hyundai Creta GS 2014-2019 Owners Manual: Emergency commodity
Your vehicle is equipped with emergency
commodities to help you
respond to emergency situation.
Fire extinguisher
If there is small fire and you know
how to use the fire extinguisher, follow
these steps carefully.
1. Pull out the safety pin at the top of
the extinguisher that keeps the ...
┬® 2017-2026 www.hcrmangs.com
