Hyundai Creta: Cylinder Block Assembly / Cylinder Block: Repair procedures
Hyundai Creta GS 2014-2019 Service Manual / Engine Mechanical System / Cylinder Block Assembly / Cylinder Block: Repair procedures
| Disassembly |
|

|

| 1. |
Remove the engine and transaxle assembly from the vehicle.
(Refer to Engine and Transaxle Assembly - "Engine and Transaxle Assembly")
|
| 2. |
Remove the transaxle assembly from the engine assembly.
|
| 3. |
Remove the drive plate or flywheel.
|
| 4. |
Remove the rear oil seal.
(Refer to Cylinder Block Assembly - "Rear Oil Seal")
|
| 5. |
Install the engine assembly to engine stand for disassembly.
|
| 6. |
Remove the intake manifold with the electronic throttle control (ETC)
module.
(Refer to Intake And Exhaust System - "Intake Manifold")
|
| 7. |
Remove the exhaust manifold.
(Refer to Intake And Exhaust System - "Exhaust Manifold")
|
| 8. |
Remove the timing chain.
(Refer to Timing System - "Timing Chain")
|
| 9. |
Remove the cylinder head assembly.
(Refer to Cylinder Head Assembly - "Cylinder Head")
|
| 10. |
Remove the oil filter.
(Refer to Lubrication System - "Oil Filter")
|
| 11. |
Remove the oil pressure switch.
(Refer to Lubrication System - "Oil Pressure Switch")
|
| 12. |
Remove the crankshaft position sensor.
(Refer to Engine Control/Fuel System - "Crankshaft Position Sensor (CKPS)")
|
| 13. |
Remove the oil pan and the oil screen.
(Refer to Lubrication System - "Oil Pan")
|
| 14. |
Remove the ladder frame.
(Refer to Cylinder Block Assembly - "Piston And Connecting Rod")
|
| 15. |
Check the connecting rod side clearance.
(Refer to Cylinder Block Assembly - "Piston And Connecting Rod")
|
| 16. |
Check the connecting rod bearing cap oil clearance.
(Refer to Cylinder Block Assembly - "Piston And Connecting Rod")
|
| 17. |
Remove the piston and connecting rod assemblies.
(Refer to Cylinder Block Assembly - "Piston And Connecting Rod")
|
| 18. |
Check the main bearing oil clearance.
(Refer to Cylinder Block Assembly - "Crankshaft")
|
| 19. |
Check the crankshaft end play.
(Refer to Cylinder Block Assembly - "Crankshaft")
|
| 20. |
Remove the crankshaft.
(Refer to Cylinder Block Assembly - "Crankshaft")
|
| 21. |
Remove the water inlet fitting and thermostat.
(Refer to Cooling System - "Thermostat")
|
| 22. |
Remove the knock sensor.
(Refer to Engine Control/Fuel System - "Knock Sensor (KS)")
|
| Inspection |
| 1. |
Using a gasket scraper, remove all the gasket material from the top
surface of the cylinder block.
|
| 2. |
Using a soft brush and solvent, thoroughly clean the cylinder block.
|
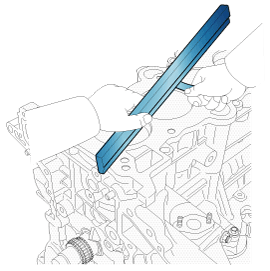
| 3. |
Inspect the top surface of cylinder block for flatness.
Using a precision straight edge and feeler gauge, measure the surface
contacting the cylinder head gasket for warpage.
|
| 4. |
Inspect the cylinder bore.
Visually check the cylinder for vertical scratchs.
If deep scratchs are present, replace the cylinder block.
|
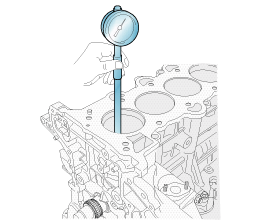
| 5. |
Inspect the cylinder bore diameter.
Using a cylinder bore gauge, measure the cylinder bore diameter at position
in the thrust and axial direction.
|
| Reassembly |
| 1. |
Install in the reverse order of disassembly.
|
 Crankshaft
Components and components location
Components
1. Crankshaft sprocket
2. Crankshaft thrust bearing
3. Crankshaft upper main bearing
4. Crankshaft
5. CK ...
 Cooling System
...
Other information:
Hyundai Creta GS 2014-2019 Service Manual: Rear Door Latch
Components and components location
Component Location
1. Rear door latch
Repair procedures
Replacement
1.
Remove the rear door trim.
(Refer to Rear Door - "Rear Door Trim")
2.
...
Hyundai Creta GS 2014-2019 Owners Manual: Warning and indicator lights
Air bag Warning Light
Once you set the ignition switch or
Engine Start/Stop button to the ON
position.
- It illuminates for approximately 6
seconds and then goes off.
When there is a malfunction with
the SRS.
In this case, we recommend that
you have the vehicle inspected ...
© 2017-2026 www.hcrmangs.com
