Hyundai Creta: Floor Console / Floor Console Assembly
Components and components location
| Component Location |
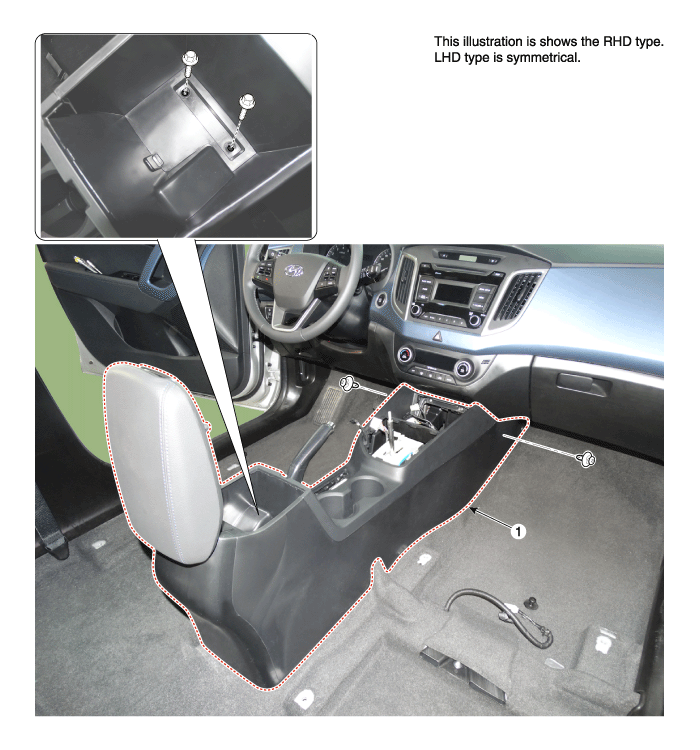
| 1. Floor console assembly |
Repair procedures
| Replacement |
|

|

| 1. |
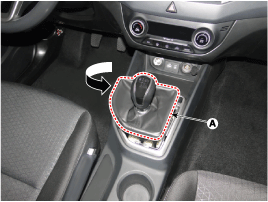
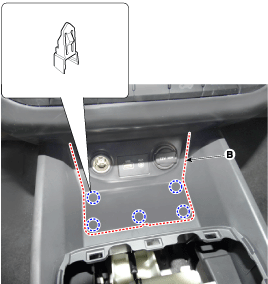
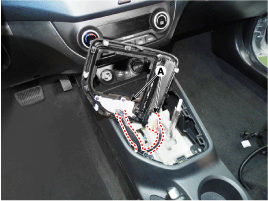
Remove the gear knob & boots (A) after turning in the counter clock-wise
direction.
|
| 2. |
Using a screwdriver or remover, remove the front console upper cover
(A).
|

| 3. |
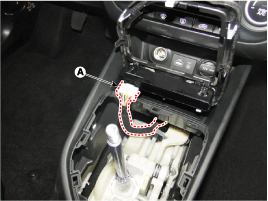
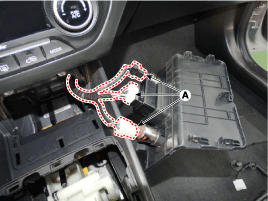
Disconnect the connectors (A).
|
| 4. |
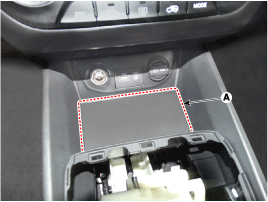
Remove the tray (B) by using remover holder hole after removing the
rubber mat (A).
|
| 5. |
Disconnect the multimedia jcak connectors (A).
|
| 6. |
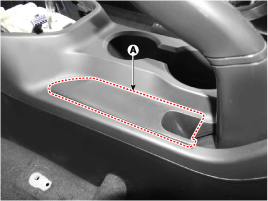
Using a screwdriver or remover, remove the parking brake cover (A).
|
| 7. |
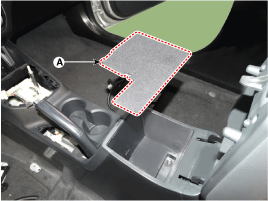
Remove the storage box pad (A).
|
| 8. |
After loosening the mounting clips and bolts, then remove the floor
console assembly (A).
|
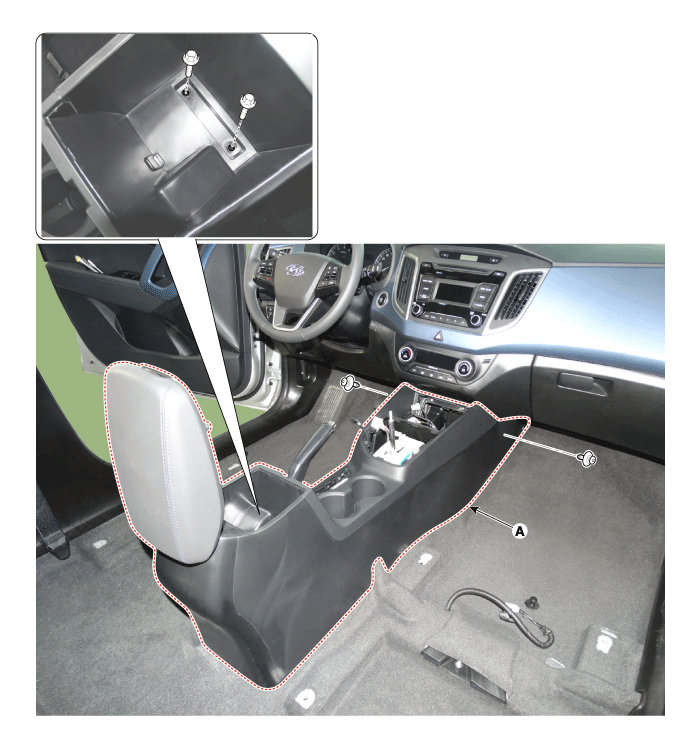
| 9. |
To install, reverse the removal procedure.
|

|
|
| 1. |
Remove the gear knob & boots (A) pull both of it up.
|
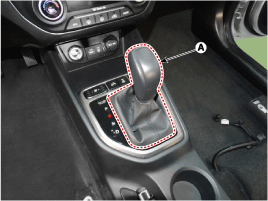
| 2. |
Using a screwdriver or remover, remove the front console upper cover
(A).
|
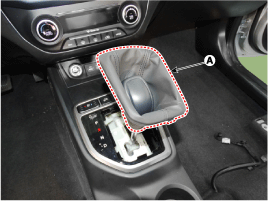
| 3. |
Disconnect the connectors (A).
|
| 4. |
Remove the tray (B) by using remover holder hole after removing the
rubber mat (A).
|
| 5. |
Disconnect the multimedia jcak connectors (A).
|
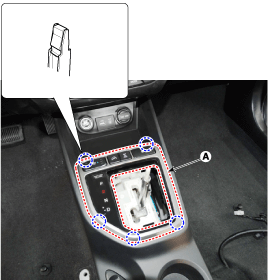
| 6. |
Using a screwdriver or remover, remove the parking brake cover (A).
|
| 7. |
Remove the storage box pad (A).
|
| 8. |
After loosening the mounting clips and bolts, then remove the floor
console assembly (A).
|
| 9. |
To install, reverse the removal procedure.
|
 Components and components location
Components
1. Parking brake cover
2. Console upper cover
3. Floor console front bezel
4. Ash tray
5. Floor console assembly
6. Console rear mounting br ...
 Rear Console Cover
Components and components location
Component Location
1. Rear console cover
Repair procedures
Replacement
& ...
Other information:
Hyundai Creta GS 2014-2026 Owners Manual: Exterior care
Exterior general caution
It is very important to follow the label
directions when using any chemical
cleaner or polish. Read all warning
and caution statements that appear
on the label.
Finish maintenance
Washing
To help protect your vehicle’s finish
from rust and deterioration, wash ...
Lincoln Nautilus 2018-2026 Owners Manual: Opening and Closing the Windows
WARNING: Do not leave children
unattended in your vehicle and do not let
them play with the power windows. Failure
to follow this instruction could result in
personal injury.
WARNING: When closing the power
windows, verify they are free of obstruction
and make sure that children and pets are
...
