Hyundai Creta: Tail Gate / Tail Gate Assembly
Hyundai Creta GS 2014-2019 Service Manual / Body (Interior and Exterior) / Tail Gate / Tail Gate Assembly
Components and components location
| Component Location |
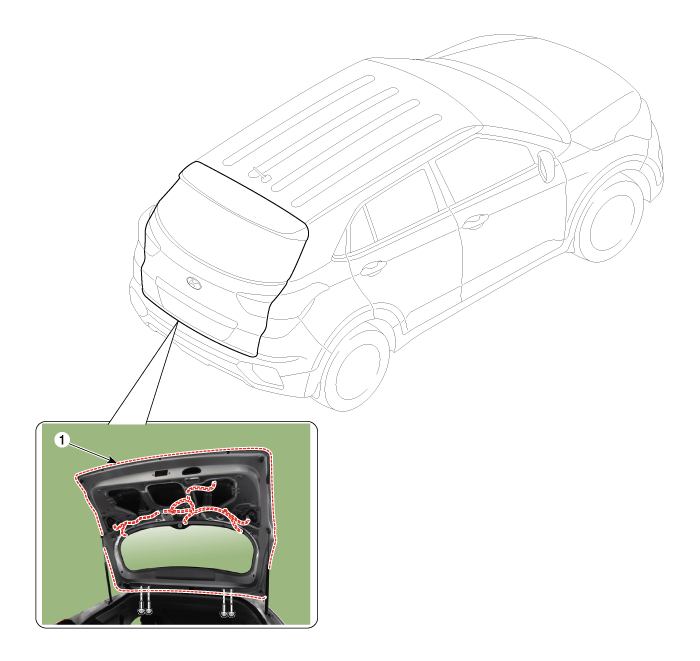
| 1. Tail gate assembly |
Repair procedures
| Replacement |
|

|

| 1. |
Remove the tail gate trim.
(Refer to Tail Gate - "Tail Gate Trim")
|
| 2. |
Remove the tail gate latch.
(Refer to Tail Gate - "Tail Gate Latch")
|
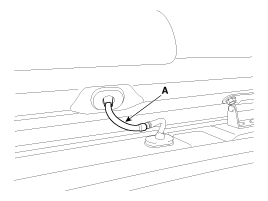
| 3. |
Disconnect the washer nozzle hose (A).
|
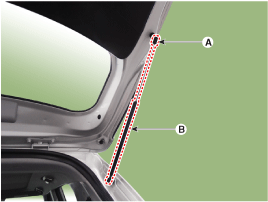
| 4. |
Using a screwdriver, lift the socket clips (A) up slightly on both ends
of the tail gate lifter (B).
|
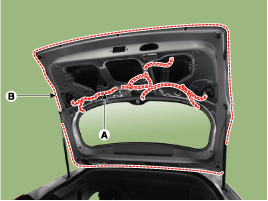
| 5. |
Disconnect the connectors and tail gate wiring harness (A).
|
| 6. |
After loosening the mounting bolts, then remove the tail gate assembly
(B).
|
| 7. |
To install, reverse the removal procedure.
|

 Repair procedures
Adjustment
1.
After loosening the tail gate hinge (A) mounting bolt, adjust the tail
gate by moving it up or down, or right or left.
2.
...
 Tail Gate Trim
Components and components location
Component Location
1. Tail gate trim
Repair procedures
Replacement
...
Other information:
Hyundai Creta GS 2014-2019 Service Manual: Repair procedures
Replacement
•
Put on gloves to protect your hands.
•
When ...
Hyundai Creta GS 2014-2019 Service Manual: Description and operation
Description
Based on information from various sensors, the ECM can calculate the fuel amount
to be injected. The fuel injector is a solenoid-operated valve and the fuel
injection amount is controlled by length of injection time. The ECM controls
each injector by grounding th ...
© 2017-2026 www.hcrmangs.com
