Hyundai Creta: Driveshaft Assembly / Front Driveshaft
Components and components location
| Components |
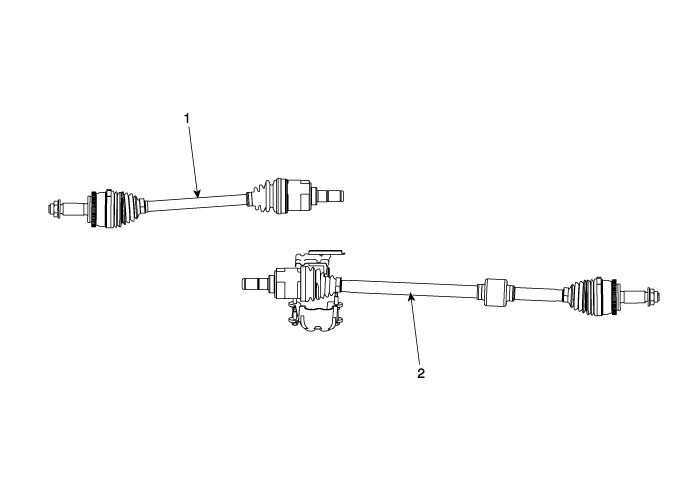
| 1. Driveshaft LH |
2. Driveshaft RH |
| Components |
| [RH] |
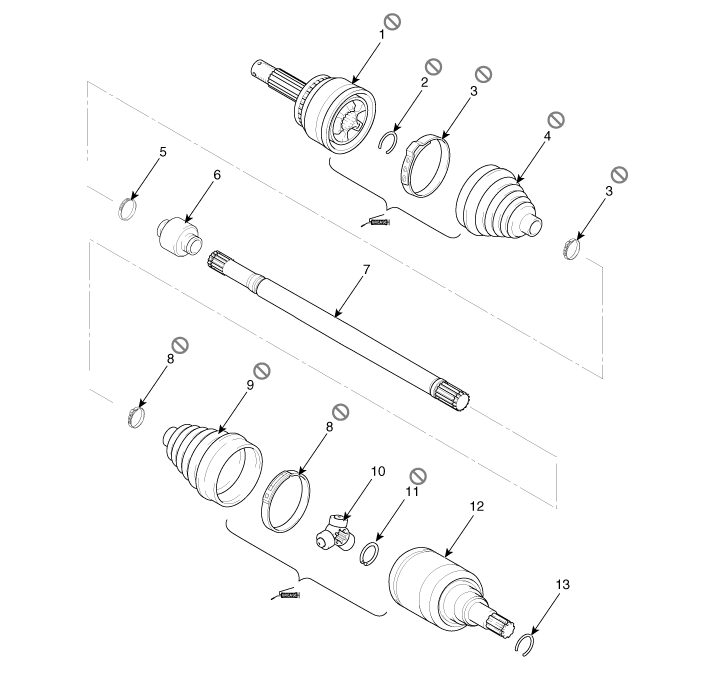
| 1. BJ assembly 2. Clip 3. BJ boot band 4. BJ boot 5. Dynamic damper band 6. Dynamic damper 7. Shaft |
8. TJ boot band 9. TJ boot 10. Spider assembly 11. Circlip 12. TJ housing 13. Circlip |
| [LH] |
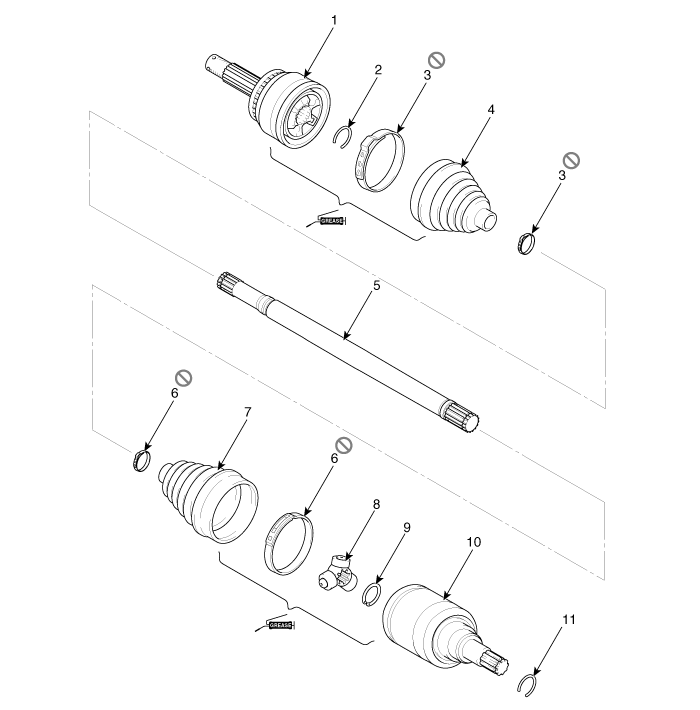
| 1. BJ assembly 2. BJ circlip 3. BJ boot band 4. BJ boot |
5. Shaft 6. TJ boot band 7. TJ boot 8. Spider assembly |
9. Snap ring 10. TJ case 11. Snap ring |
Repair procedures
| Removal |
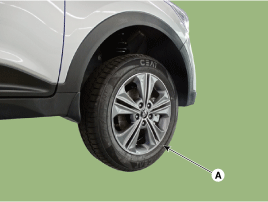
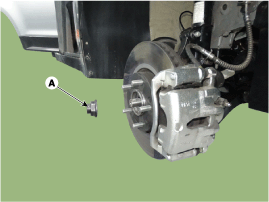
| 1. |
Remove the front wheel and tire (A) from front hub.
|

| 2. |
Remove the caulking nut (A).
|
| 3. |
Remove the tie rod end ball joint.
|
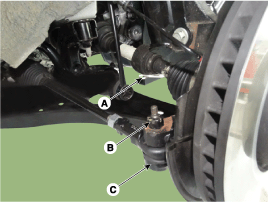
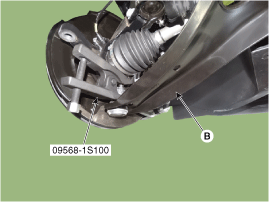
| 4. |
Remove the lower arm (B) from the knuckle by loosening the mounting
nut (A).
|

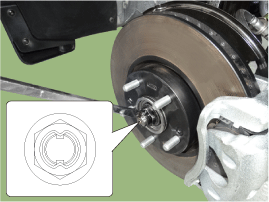
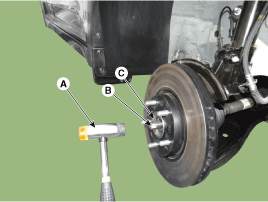
| 5. |
Using a plastic hammer (A), disconnect driveshaft (B) from the axle
hub (C).
|
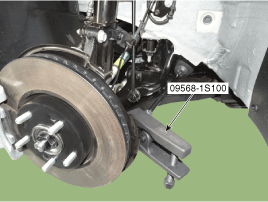
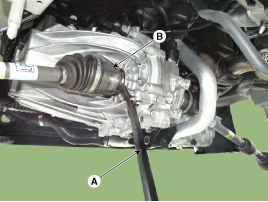
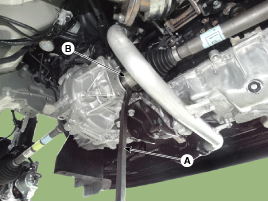
| 6. |
Insert a pry bar (A) between the transaxle case and joint case, and
separate the drive shaft (B) from the transaxle case.
[LH]
[RH]
|
| 7. |
Install in the reverse order of removal.
|
| 8. |
Check the front alignment.
(Refer to Suspension System - "Alignment")
|

 TJ Joint
Components and components location
Components
[LH]
1. BJ assembly
2. BJ circlip
3. BJ boot band
4. BJ boot
5. Shaft
6. TJ boot ...
Other information:
Hyundai Creta GS 2014-2019 Service Manual: Description and operation
Description of ESP
Optimum driving safety now has a name : ESP, the Electronic Stability Program.
ESP recognizes critical driving conditions, such as panic reactions in dangerous
situations, and stabilizes the vehicle by wheel-individual braking and engine
control inter ...
Hyundai Creta GS 2014-2019 Service Manual: Heated Oxygen Sensor (HO2S)
Description and operation
Description
Heated Oxygen Sensor (HO2S) consists of zirconium and alumina and is installed
on upstream and downstream of the Warm up Catalytic Converter (WCC).
After it compares oxygen consistency of the atmosphere with the exhaust gas,
it transfe ...
