
Hyundai Creta: Driveshaft Assembly / TJ Joint
Components and components location
| Components |
| [LH] |
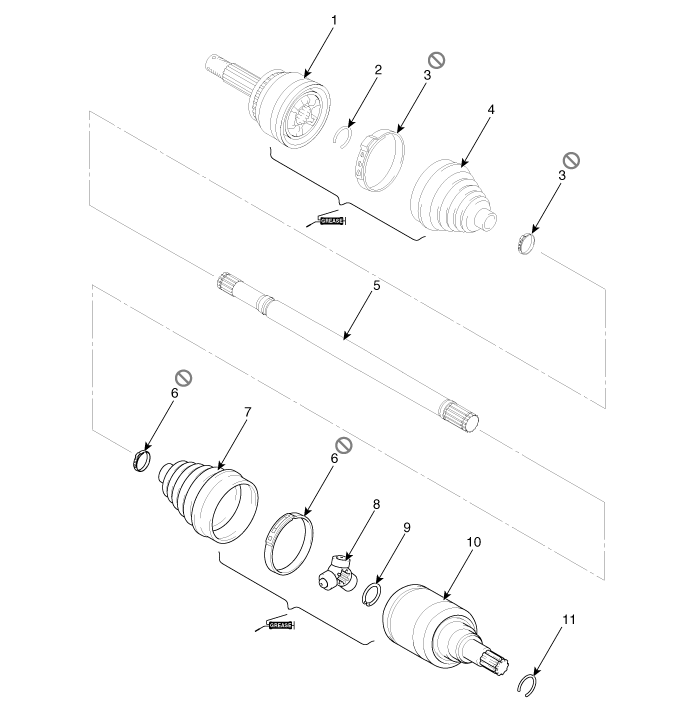
|
1. BJ assembly 2. BJ circlip 3. BJ boot band 4. BJ boot |
5. Shaft 6. TJ boot band 7. TJ boot 8. Spider assembly |
9. Retainer ring 10. TJ housing 11. Housing circlip |
| [RH] |
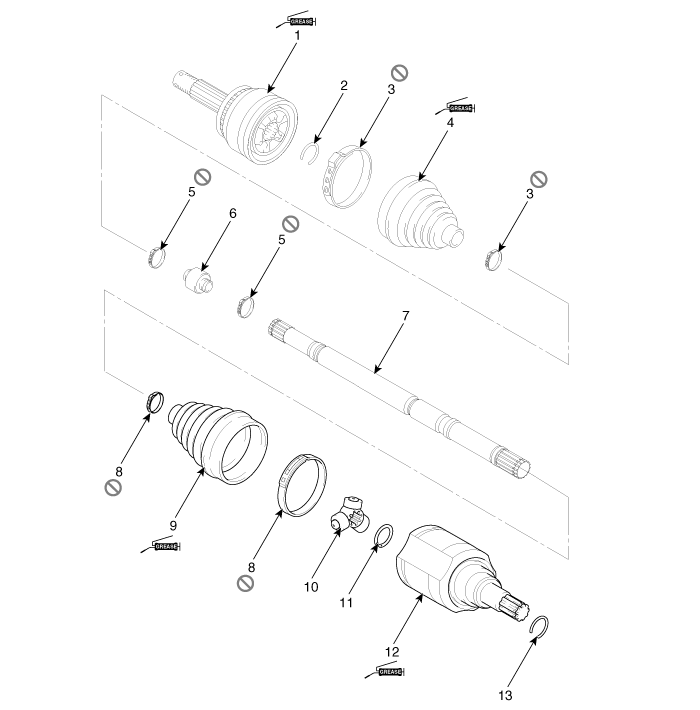
| 1. BJ
assembly 2. BJ circlip 3. BJ boot band 4. BJ boot |
5. Dynamic
damper band 6. Dynamic damper 7. Shaft 8. TJ boot band |
9. TJ
boot 10. Spider assembly 11. Retainer ring 12. TJ housing |
13. Housing
circlip |
Repair procedures
| Removal |
|

| 1. |
Remove the Front Driveshaft.
(Refer to Driveshaft Assembly - "Front Driveshaft")
|
| 2. |
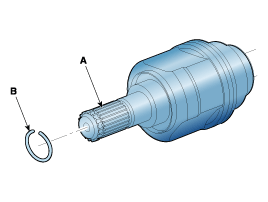
Remove the housing circlip (B) from the driveshaft spline (A).
|
| 3. |
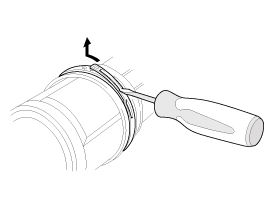
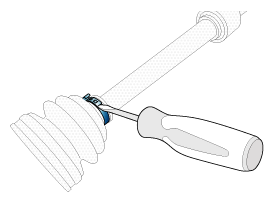
Remove both boot bands from the TJ housing.
|
| 4. |
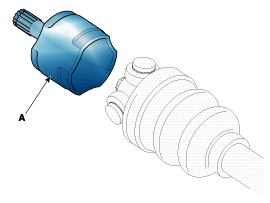
Remove the TJ housing (A).
|
| 5. |
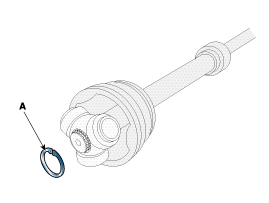
Remove the retainer ring (A) from the shaft.
|
| 6. |
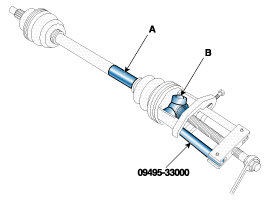
Remove the spider assembly (B) from the driveshaft (A) using the special
tool (09495-33000).
|
| 7. |
Clean the spider assembly.
|
| 8. |
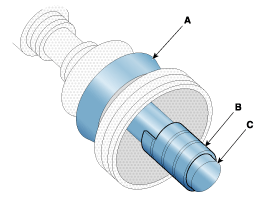
Remove the TJ boot (A).
|
| Inspection |
| 1. |
Check the spider assembly for roller rotation, wear or corrosion.
|
| 2. |
Check the groove inside the joint case for wear or corrosion
|
| 3. |
Check the TJ boots for damage and deterioration.
|
| Installation |
| 1. |
Wrap tape around the driveshaft spline (TJ) to prevent damage to the
boot.
|
| 2. |
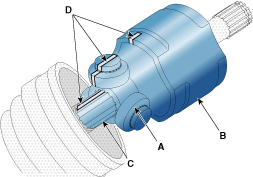
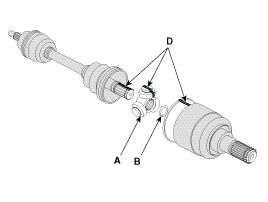
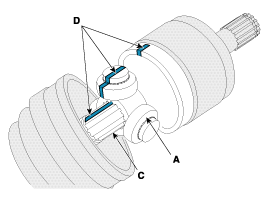
Using the alignment marks (D) made during disassembly as a guide, install
the spider assembly (A) and retainer ring (B) on the driveshaft splines
(C).
|
| 3. |
Add specified grease to the joint boot as much as it was wiped away
at inspection.
|
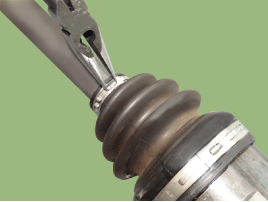
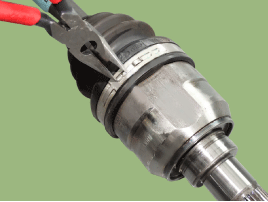
| 4. |
Install the both boot band.
|
| 5. |
Install the boot band.
|
| 6. |
Install the front driveshaft.
(Refer to Driveshaft Assembly - "Front Driveshaft")
|
| 7. |
Check the front alignment.
(Refer to Suspension System - "Alignment")
|
 Front Driveshaft
Components and components location
Components
1. Driveshaft LH
2. Driveshaft RH
Components
[RH]
1. BJ assembl ...
 Dynamic Damper
Components and components location
Components
1. BJ
assembly
2. BJ circlip
3. BJ boot band
4. BJ boot
5. Dynamic
damper band
6. Dynamic damper
...
Other information:
Hyundai Creta GS 2014-2019 Service Manual: Repair procedures
Operation and Leakage Check
Check all of the following items :
Component
Procedure
Brake Booster (A)
Check brake operation by applying the brakes during a test drive. If the
brakes do not work properly, check the brake boo ...
Hyundai Creta GS 2014-2019 Service Manual: Schematic diagrams
Schematic Diagrams
Terminal function
Type
Pin No
Description
MDPS
Power
1
Battery +
2
Battery -
MDPS
Unit
1
IGN
...
© 2017-2026 www.hcrmangs.com
