Hyundai Creta: Light bulbs / Rear combination light bulb replacement
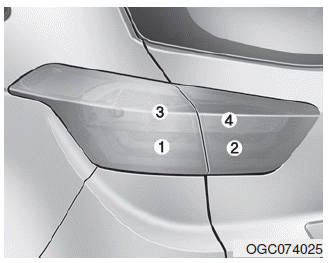
(1) Stop/Tail light
(2) Tail light
(3) Rear turn signal light
(4) Back-up light
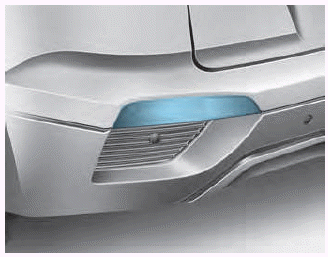
Outside light
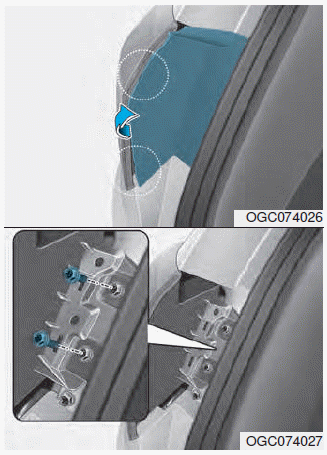
1. Open the tailgate
2. Loosen the light assembly retaining screws with a cross-tip screwdriver.
3. Remove the rear combination light assembly from the body of the vehicle.
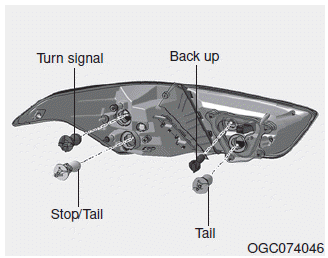
4. Remove the socket from the assembly by turning the socket counterclockwise until the tabs on the socket align with the slots on the assembly.
5. Remove the bulb from the socket by pressing it in and rotating it counterclockwise until the tabs on the bulb align with the slots in the socket. Pull the bulb out of the socket.
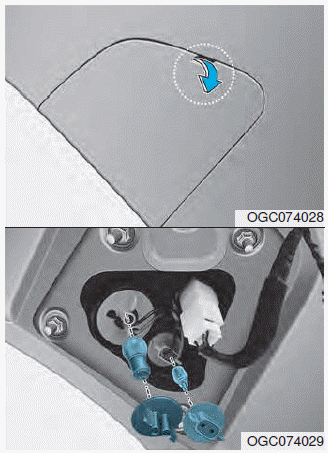
Inside lamp
Back-up light/Tail light
1. Turn off the engine.
2. Open the tailgate.
3. Remove the service cover using a flat-blade screwdriver.
4.Remove the socket from the assembly by turning the socket counterclockwise until the tabs on the socket align with the slots on the assembly.
5.Remove the bulb from the socket by pressing it in and rotating it counterclockwise until the tabs on the bulb align with the slots in the socket. Pull the bulb out of the socket.
6.Insert a new bulb into the socket.
7.Install the socket into the assembly by aligning the tabs on the socket with the slots on the assembly and turning the socket clockwise.
Rear fog lamp
1.Remove the socket from the assembly by turning the socket counterclockwise until the tabs on the socket align with the slots on the assembly.
2.Remove the bulb from the socket by pressing it in and rotating it counterclockwise until the tabs on the bulb align with the slots in the socket. Pull the bulb out of the socket.
3.Insert a new bulb in the socket.
4.Reinstall the light assembly to the body of the vehicle.
 Side repeater lamp bulb replacement
If the light bulb does not operate, we
recommend that you checked an
authorized HYUNDAI dealer. ...
 High mounted stop light
If the light does not operate, we recommend
that the vehicle be checked
by an authorized HYUNDAI dealer. ...
Other information:
Hyundai Creta GS 2014-2019 Owners Manual: Air cleaner
Filter replacement
You can clean the filter when inspecting
the air cleaner element.
Clean the filter by using compressed
air.
1. Loosen the air cleaner cover
attaching clips and open the cover.
2. Wipe the inside of the air cleaner.
3. Replace the air cleaner filter.
4. Lock the cov ...
Hyundai Creta GS 2014-2019 Owners Manual: Wheel alignment and tire balance
The wheels on your vehicle were
aligned and balanced carefully at the
factory to give you the longest tire life
and best overall performance.
In most cases, you will not need to
have your wheels aligned again.
However, if you notice unusual tire
wear or your vehicle pulling one way
or ...
