
Hyundai Creta: Rear Seat / Rear Seat Back Cover
Components and components location
| Component Location |
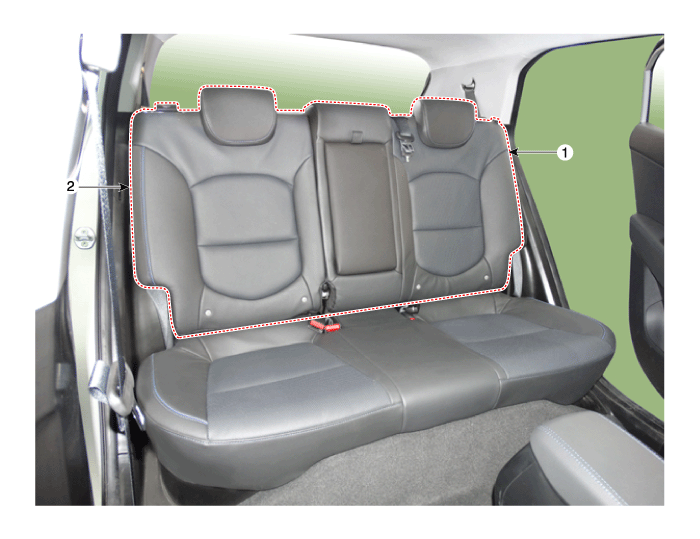
| 1. Rear seat back cover [LH] |
2. Rear seat back cover [RH] |
Repair procedures
| Replacement |
| (LH) |
|

|

| 1. |
Remove the rear seat back assembly [LH].
(Refer to Rear Seat - "Rear Seat Assembly")
|
| 2. |
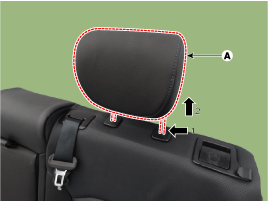
Push the lock pin (B), remove the rear seat headrest (A).
|
| 3. |
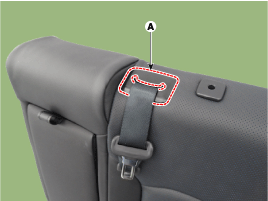
Using a screwdriver or remover, remove the rear center seat belt upper
anchor cover (A).
|
| 4. |
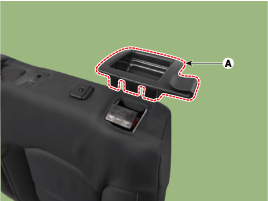
Using a screwdriver or remover, remove the rear seat folding cover (A).
|
| 5. |
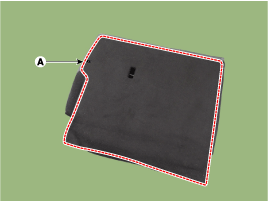
Remove the carpet back panel [LH] (A).
|
| 6. |
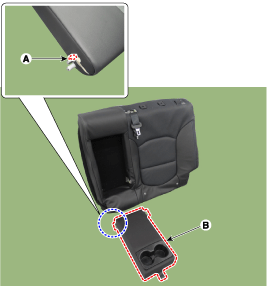
Using a screwdriver or remover, remove the armrest spacer (A).
|
| 7. |
Remove the rear armrest (B) from the rear seat back assembly.
|
| 8. |
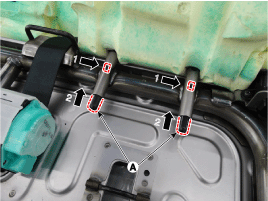
Turn the rear seat back cover inside out. Then pull out the headrest
guides (A) while pinching the upper part of the guides, and remove them.
|
| 9. |
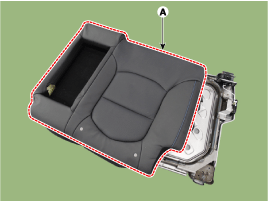
Remove the rear seat back cover (A) from the rear seat back frame.
|
| 10. |
After removing the hog-ring (A) on the rear of seat back and remove
the rear seat back cover (B).
|
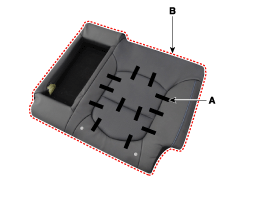
| 11. |
To install, reverse the removal procedure.
|

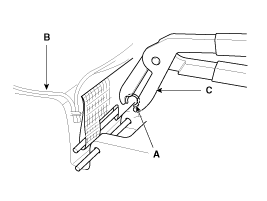
| (RH) |
|
|
| 1. |
Remove the second row seat assembly [RH].
(Refer to Rear Seat - "Rear Seat Assembly")
|
| 2. |
Push the lock pin (B), remove the rear seat headrest (A).
|
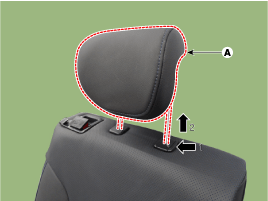
| 3. |
Using a screwdriver or remover, remove the rear seat folding cover (A).
|
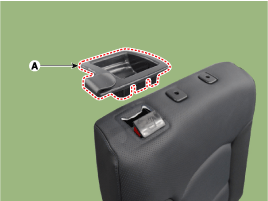
| 4. |
Remove the carpet back panel [RH] (A).
|
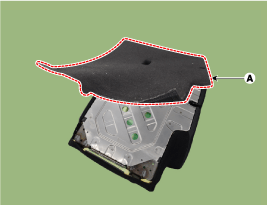
| 5. |
Remove the protector (A) located in the side part of the rear seat back.
|
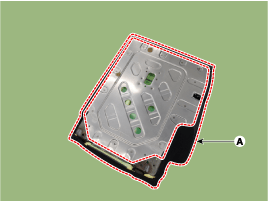
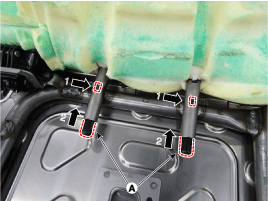
| 6. |
Turn the rear seat back cover inside out. Then pull out the headrest
guides (A) while pinching the upper part of the guides, and remove them.
|
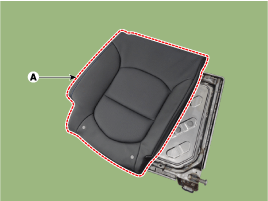
| 7. |
Remove the rear seat back cover (A) from the rear seat back frame.
|
| 8. |
After removing the hog-ring (A) on the rear of seat back and remove
the rear seat back cover (B).
|
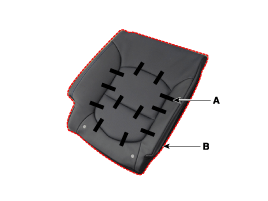
| 9. |
To install, reverse the removal procedure.
|
|
|
| 1. |
Remove the rear seat back assembly.
(Refer to Rear Seat - "Rear Seat Assembly")
|
| 2. |
Using a screwdriver or remover, remove the armrest spacer (A).
|
| 3. |
Remove the rear armrest (B) from the rear seat back assembly.
|
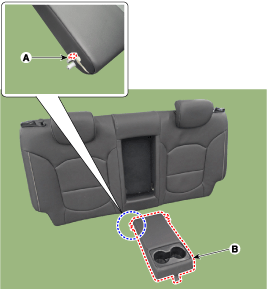
| 4. |
Push the lock pins (B), and remove the rear seat headrest (A).
|
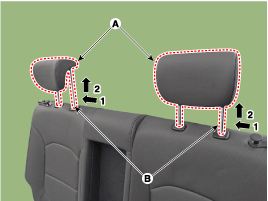
| 5. |
Remove the rear seat folding knob (A) after turning in the counter clock-wise
direction.
|
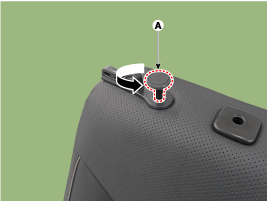
| 6. |
After loosening the mounting screw, remove the rear back fold guide
bezel (A).
|
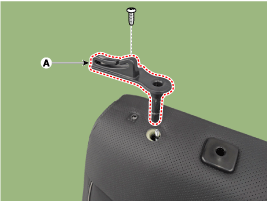
| 7. |
Zip off the rear seat back cover (A), and then full it up.
|
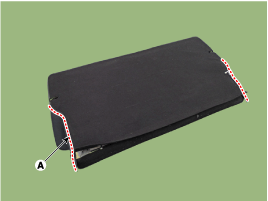
| 8. |
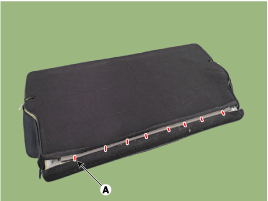
After removing the hog-ring clips on the rear of seat back and remove
the rear seat back cover (A).
[Rear side]
|
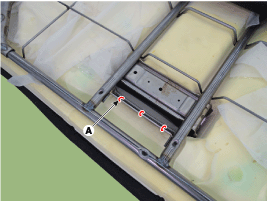
| 9. |
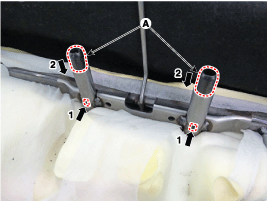
Pull out the rear seat headrest guides (A) while pinching both sides
of the lower part of the guides, and remove them.
|
| 10. |
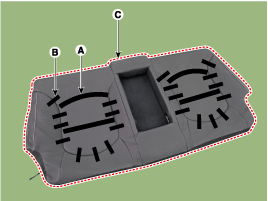
After removing the velcro tape (A) and clips (B) on the front of seat
back and remove the rear seat back cover (C).
[Front side]
|
| 11. |
To install, reverse the removal procedure.
|
 Rear Seat Assembly
Components and components location
Component Location
[ 6:4 Back folding type
]
1. Rear seat cushion assembly
2. Rear seat back assembly
...
 Rear Seat Cushion Cover
Components and components location
Component Location
1. Rear seat cushion cover
Repair procedures
Replacement
1.
...
Other information:
Hyundai Creta GS 2014-2019 Owners Manual: Recommended cold tire inflation
pressures
All tire pressures (including the
spare) should be checked when the
tires are cold. “Cold Tires� means the
vehicle has not been driven for at
least three hours or driven less than
1.6 km (one mile).
Recommended pressures must be
maintained for the best ride, top vehicle
handling, ...
Hyundai Creta GS 2014-2019 Service Manual: Intake Actuator
Components and components location
Components Location
1. Intake actuator
Description and operation
Description
The intake actuator is located at the blower unit. It regulates the intake door
by a signal from the control unit. Pre ...
