Hyundai Creta: Floor Carpet / Repair procedures
Hyundai Creta GS 2014-2025 Service Manual / Body (Interior and Exterior) / Floor Carpet / Repair procedures
| Replacement |
|
|
| 1. |
Remove the front seat assembly.
(Refer to Front Seat - "Front Seat Assembly")
|
| 2. |
Remove the rear seat cushion assembly.
(Refer to Rear Seat - "Rear Seat Assembly")
|
| 3. |
Slighty remove the front door body side weatherstrip.
|
| 4. |
Slighty remove the rear door body side weatherstrip.
|
| 5. |
Remove the front door scuff trim.
(Refer to Interior Trim - "Front Door Scuff Trim")
|
| 6. |
Remove the rear door scuff trim.
(Refer to Interior Trim - "Rear Door Scuff Trim")
|
| 7. |
Remove the center pillar lower trim.
(Refer to Interior Trim - "Center Pillar Trim")
|
| 8. |
Remove the cowl side trim.
(Refer to Interior Trim - "Cowl Side Trim")
|
| 9. |
Remove the luggage side trim.
(Refer to Interior Trim - "Luggage Side Trim")
|
| 10. |
Remove the floor console assembly.
(Refer to Floor Console - "Floor Console Assembly")
|
| 11. |
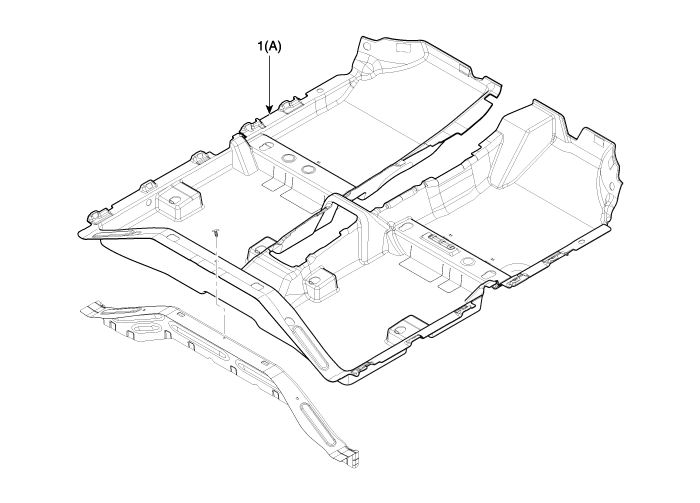
Remove the floor carpet assembly (A).
|
| 12. |
To install, reverse the removal procedure.
|
 Floor Carpet
...
 Front Bumper
...
Other information:
Hyundai Creta GS 2014-2025 Owners Manual: SRS components and functions
The SRS consists of the following
components:
(1) Driver's front air bag module*
(2) Passenger's front air bag module*
(3) Pre-tensioner seatbelt system*
(4) Driver's air bag warning light*
(5) SRS control module (SRSCM)*
(6) Front impact sensors*
(7) Side impact air bag ...
Hyundai Creta GS 2014-2025 Service Manual: Components and components location
Component Location Index
[Engine Room]
1. Ambient temperature Sensor
2. Condenser
3. Compressor
4. Discharge Hose
5. Service Port (High Pressure)
6. Suction & Liquid Tube Assembly
7. Service Port (Low Pressure)
8. Expansion Valve ...


