
Hyundai Creta: Heater / Temperature Control Actuator
Hyundai Creta GS 2014-2019 Service Manual / Heating, Ventilation and Air Conditioning / Heater / Temperature Control Actuator
Components and components location
| Components Location |
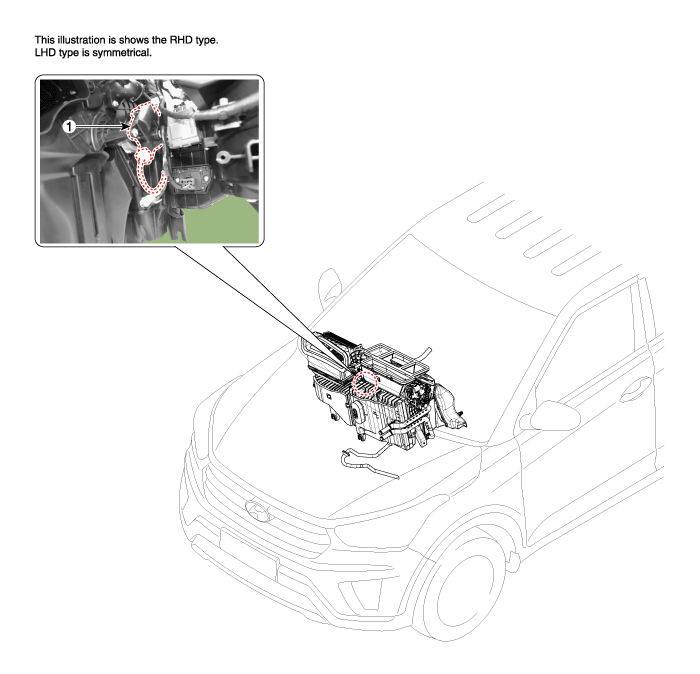
| 1. Temperature control actuator |
Description and operation
| Description |
The temperature control actuator is located at the heater unit. It regulates
the temperature by the procedure as follows.
The signal from the control unit adjusts the position of the temperature door
by operating the temperature switch. Then the temperature will be regulated
by the hot/cold air ratio decided by the position of the temperature door.
Repair procedures
| Inspection |
| 1. |
Turn the ignition switch OFF.
|
| 2. |
Disconnect the temperature control actuator connector.
|
| 3. |
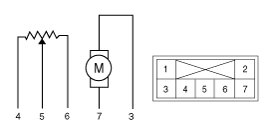
Verify that the temperature control actuator operates to the cool position
when connecting 12V to terminal 3 and grounding terminal 7.
Verify that the temperature control actuator operates to the warm position
when connected in reverse.
|
| 4. |
Connect the temperature control actuator connector.
|
| 5. |
Turn the ignition switch ON.
|
| 6. |
Check the voltage between terminal 5 and 6.
Specification
It will feedback the current position of the actuator to controls.
|
| 7. |
If the measured voltage is not within specification, substitute with
a known-good temperature control actuator and check for proper operation.
|
| 8. |
Replace the temperature control actuator if it is proved that there
is a problem with it.
|
| Diagnosis With GDS |
| 1. |
The heating, ventilation and air conditioning can be quickly diagnosed
failed parts with vehicle diagnostic system (GDS).
※ The diagnostic system (GDS) provides the following information.
(1) Self diagnosis : Checking the failure code (DTC) and display.
(2) Current data : Checking the system input/output data state.
(3) Actuation test : Checking the system operation condition.
(4) Additional function : Other controlling such as he system option
and zero point adjustment.
|
| 2. |
Select the 'Car model' and the system to be checked in order to check
the vehicle with the tester.
|
| 3. |
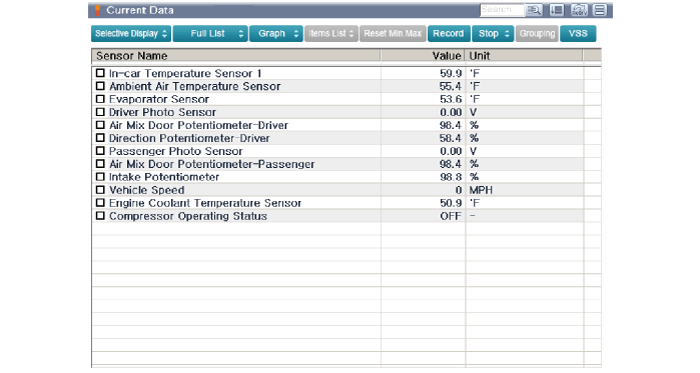
Select the 'Current data' menu to search the current state of the input/output
data.
The input/output data for the sensors corresponding to the Temperature
Control Actuator can be checked.
|
| 4. |
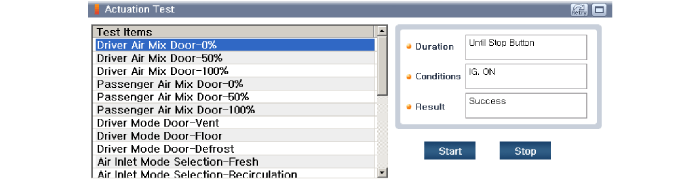
To perform compulsory operation on Temperature Control Actuator input
factors, select "ACTUATION TEST".
|
| Replacement |
| 1. |
Disconnect the negative (-) battery terminal.
|
| 2. |
Remove the glove box housing.
(Refer to Body - "Glove Box Housing")
|
| 3. |
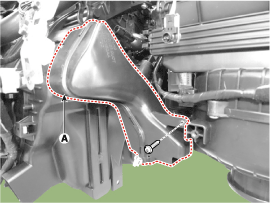
Remove the passenger's side shower duct (A) after loosening the screw.
|
| 4. |
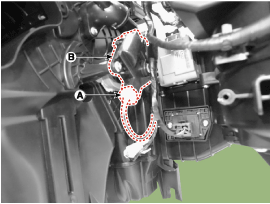
Disconnect the connector (A) and then remove the passenger's side temperature
control actuator (B) after loosening the mounting screws.
|
| 5. |
Install in the reverse order of removal.
|
 Evaporator Core: Repair procedures
Replacement
1.
Disconnect the negative (-) battery terminal.
2.
Remove the heater and blower assembly.
(Refer to Heater -"Hea ...
Other information:
Hyundai Creta GS 2014-2019 Owners Manual: Floor mat anchor(s)
ALWAYS use the Floor Mat Anchors
to attach the front floor mats to the
vehicle. The anchors on the front
floor carpet keep the floor mats from
sliding forward.
WARNING
The following must be observed
when installing ANY floor mat to
the vehicle.
Ensure that the floor mats are
s ...
Hyundai Creta GS 2014-2019 Service Manual: Front Door Trim
Components and components location
Component Location
1. Front door trim
Repair procedures
Replacement
•
Put on gloves to protect you ...
© 2017-2026 www.hcrmangs.com
