Hyundai Creta: Crash Pad / Crash Pad Lower Panel
Components and components location
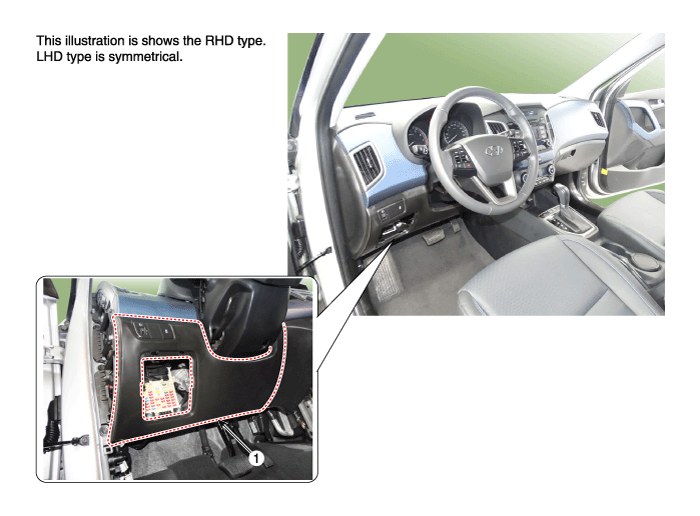
Repair procedures
| • |
Put on gloves to protect your hands.
|
|
| • |
When prying with a flat-tip screwdriver or use a prying trim
tool, wrap it with protective tape, and apply protective tape
around the related parts, to prevent damage.
|
| • |
Use a plastic panel removal tool to remove interior trim pieces
to protect from marring the surface.
|
| • |
Take care not to bend or scratch the trim and panels.
|
|
| 1. |
Remove the cowl side trim.
(Refer to Interior Trim - "Cowl Side Trim")
|
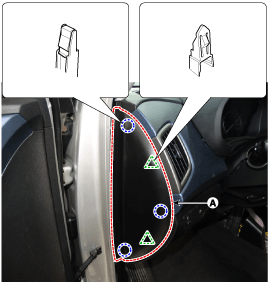
| 2. |
Using a screwdriver or remover, remove the crash pad side cover [LH]
(A).
|
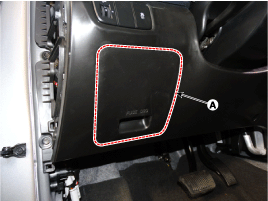
| 3. |
Remove the fuse box cover (A).
|
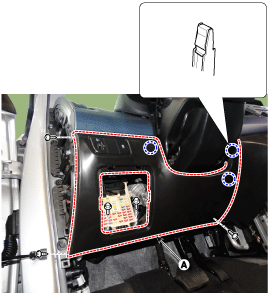
| 4. |
After loosening the mounting bolts and screws, then remove the crash
pad lower panel (A).
|
| 5. |
Disconnect the diagnosis connector (A).
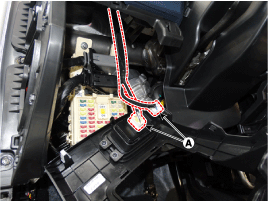
|
| 6. |
To install, reverse the removal procedure.
| •
|
Make sure the connector are connected in properly.
|
| •
|
Replace any damaged clips.
|
|
|
Components and components location
Component Location
1. Cluster fascia panel
Repair procedures
Replacement
...
Components and components location
Component Location
1. Glove box housing
Repair procedures
Replacement
&n ...
Other information:
Hyundai Creta GS 2014-2026 Owners Manual: Warning and indicator lights
Air bag Warning Light
Once you set the ignition switch or
Engine Start/Stop button to the ON
position.
- It illuminates for approximately 6
seconds and then goes off.
When there is a malfunction with
the SRS.
In this case, we recommend that
you have the vehicle inspected ...
Lincoln Nautilus 2018-2026 Owners Manual: Fuel Quality
Selecting the Correct Fuel
Your vehicle operates on regular unleaded
gasoline with a minimum pump (R+M)/2
octane rating of 87.
Some fuel stations, particularly those in high
altitude areas, offer fuels posted as regular
unleaded gasoline with an octane rating
below 87. The use of these fuels c ...

 Cluster Fascia Panel
 Glove Box Housing


