Hyundai Creta: Manual Transaxle System / Manual Transaxle
Hyundai Creta GS 2014-2019 Service Manual / Manual Transaxle System / Manual Transaxle System / Manual Transaxle
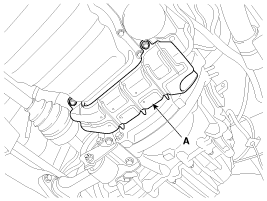
Components and components location
| Components |
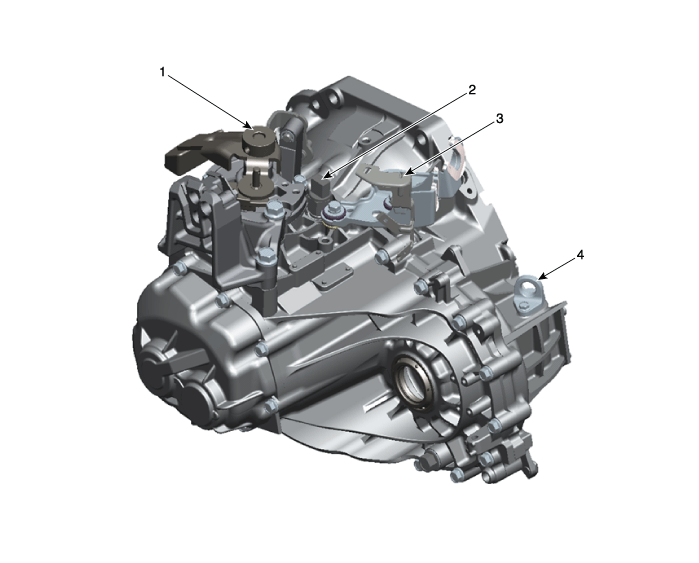
| 1. Control shaft complete 2. Back-up lamp switch |
3. Control cable bracket 4. Plug |
Repair procedures
| Removal |
| 1. |
Remove the air cleaner assembly.
(Refer to Engine Mechanical System - " Air Cleaner)
|
| 2. |
Remove the battery and battery tray.
(Refer to Engine Electrical System - "Battery")
|
| 3. |
Remove the ECM.
(Refer to Engine Control System - "ECM")
|
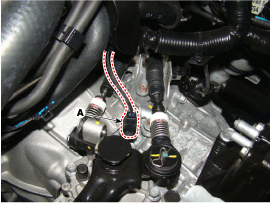
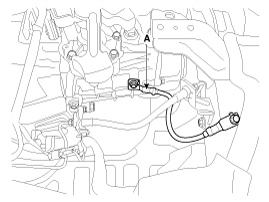
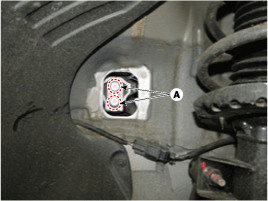
| 4. |
Disconnect the back-up lamp switch connector (A).
|
| 5. |
Disconnect the select or shift cable assembly after removing the pin
(A).
|
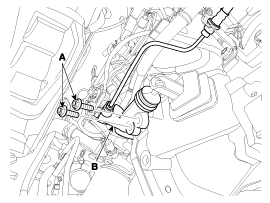
| 6. |
Remove the control cable bracket after removing the bolt (B-3ea).
|
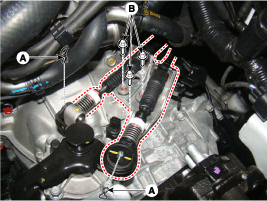
| 7. |
Remove the wiring bracket bolt (A).
|
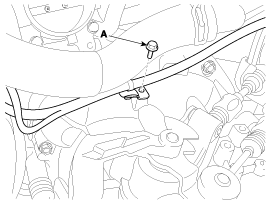
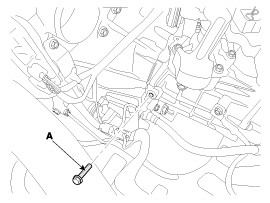
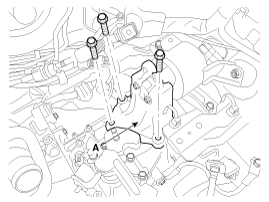
| 8. |
Remove the gruing cable from transaxle (A).
|
| 9. |
Remove the clutch tube bracket bolt (A).
|
| 10. |
Remove the transaxle upper mounting bolt (B-2ea) and the start motor
mounting bolt (A-2ea).
|
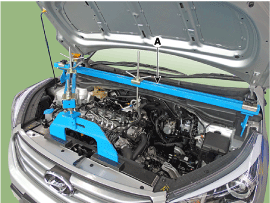
| 11. |
Assembled the engine support fixture. (beam No.: 09200-38001 or 09200-3N000,
supporter No.: 09200-2S000)
(Refer to Special Service Tools - " Engine support fixture special tool
assembly drawing")
|
| 12. |
Using the engine support fixture (A), hold the engine and transaxle
assembly safely.
|
| 13. |
Remove the manual transaxle mounting bracket cover (A).
|
| 14. |
Remove the manual transaxle mounting bracket bolts (A).
|
| 15. |
Remove the transaxle support mounting bracket (A).
|
| 16. |
Remove the under cover.
(Refer Engine Mechanical System - "Engine Room Under Cover")
|
| 17. |
Remove the drive shaft assembly.
(Refer to Drive shaft and axle - "Front Driveshaft")
|
| 18. |
Remove the clutch release cylinder (B) after removing the bolt (A-2ea).
|
| 19. |
Remove the air guide bracket (A).
|
| 20. |
Remove the roll stopper after removing the bolt (A) and (B).
|
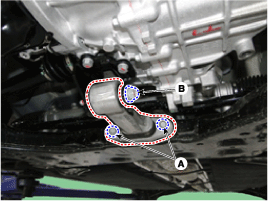
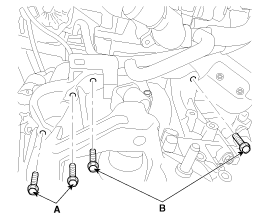
| 21. |
Remove the roll rod support bracket (B).
|

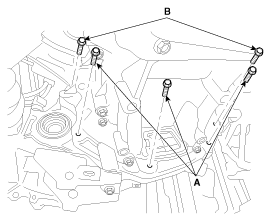
| 22. |
Remove the mounting bolts (A-4ea, B-2ea) of lower part of the transaxle,
and the left side cover and remove the transaxle assembly by supporting
it with a jack.
|

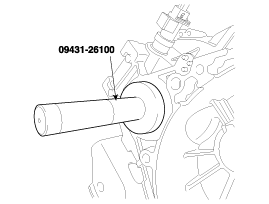
| Installation |
If the oil seal on the transaxle case side is damaged and fluid is leaking,
replace the oil seal with a new unit.
When installing the new oil seal, use the specialized tool (oil seal
installer, 09431-26100).
|

| 1. |
Add Manual transaxle fluid.
(Refer to Manual Transaxle System - "Manual Transaxle Fulid")
|
 Manual Transaxle Fluid
General information
General Information
1.
Check & Change intervals
Check
& Replenishment
Change
...
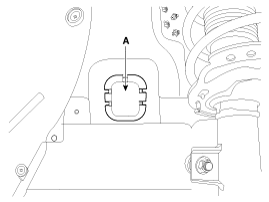
 Back-up Lamp Switch
Description and operation
Description
Component location : Manual transaxle case
Operation principle : Back up lamp switch is pushed by the reverse lug sliding
when select ...
Other information:
Hyundai Creta GS 2014-2019 Owners Manual: Air bag-supplemental restraint system(SRS)
Ō¢Ā Left-hand drive
1. DriverŌĆÖs front air bag*
2. PassengerŌĆÖs front air bag*
3. Side impact air bag*
4. Curtain air bag*
Ō¢Ā Right-hand drive
1. DriverŌĆÖs front air bag*
2. PassengerŌĆÖs front air bag*
3. Side impact air bag*
4. Curtain air bag*
WARNING
Even in vehicles with a ...
Hyundai Creta GS 2014-2019 Service Manual: Components and components location
Component Location
1. BCM (Body Control Module)
2. Ultrasonic sensor
ŌĆ╗ Rear parking assist control
unit function is built in BCM (body control unit).
...
┬® 2017-2026 www.hcrmangs.com
