Hyundai Creta: Power Windows / Power Window Switch
Hyundai Creta GS 2014-2019 Service Manual / Body Electrical System / Power Windows / Power Window Switch
Components and components location
| Components |
| [Main Power Window Switch] |
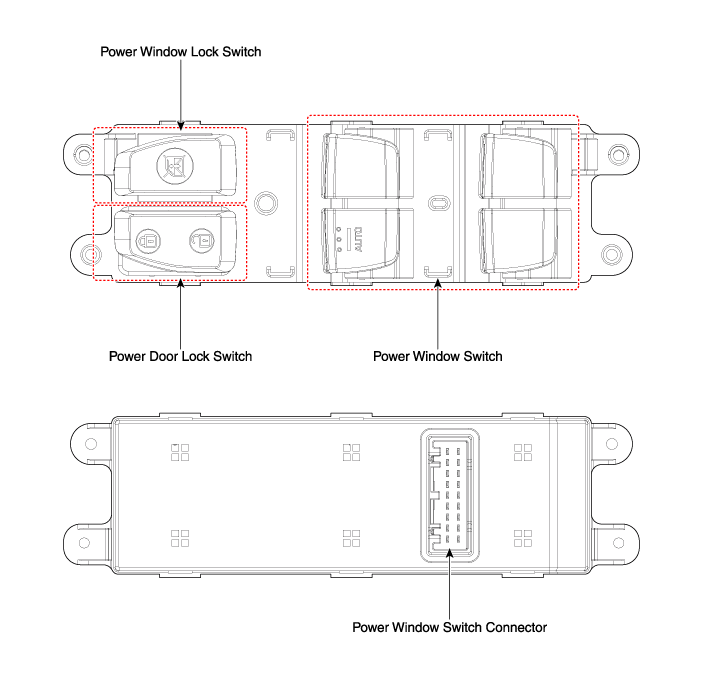
| [Passenger / Rear Power Window Switch] |
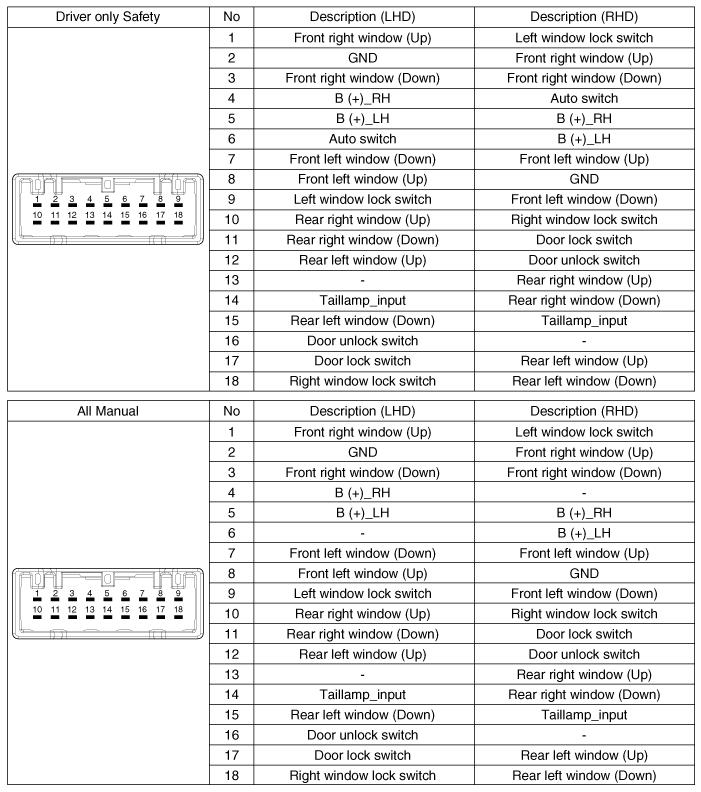
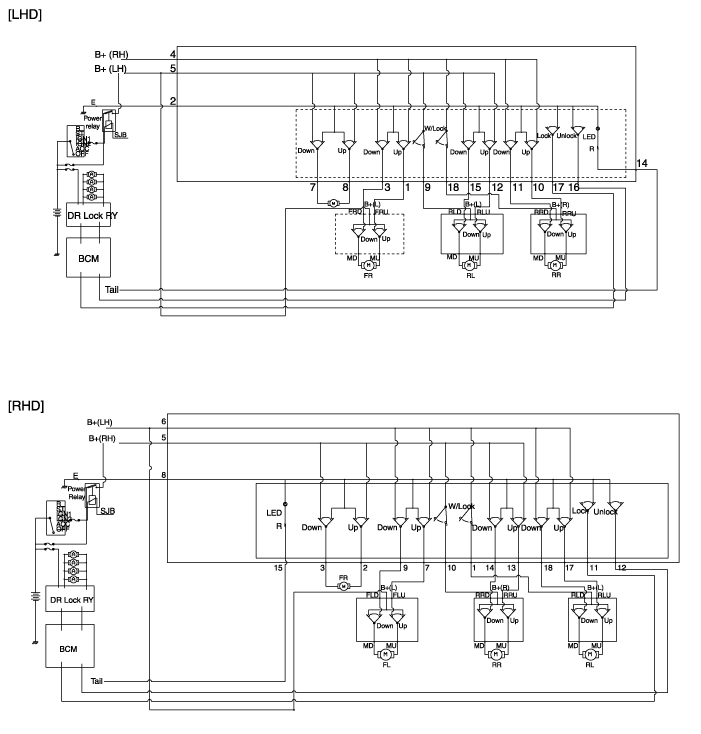
Schematic diagrams
| Circuit Diagram |
| [Main Power Window Switch (Driver only Safety)] |
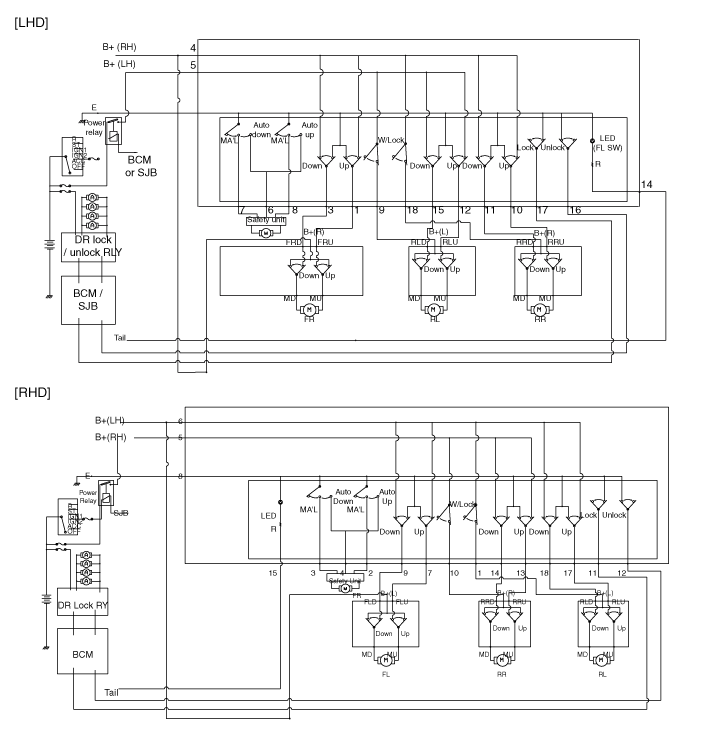
| [Main Power Window Switch (All Manual)] |
Repair procedures
| Inspection |
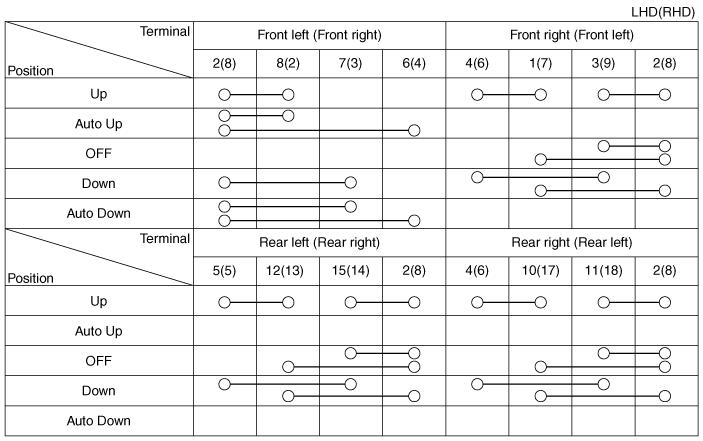
Power Window Main Switch Inspection
| 1. |
Disconnect the negative (-) battery terminal.
|
| 2. |
Remove the front door trim.
(Refer to Body - "Front Door Trim")
|
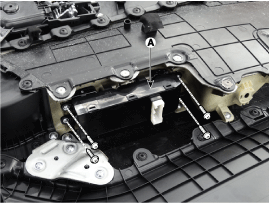
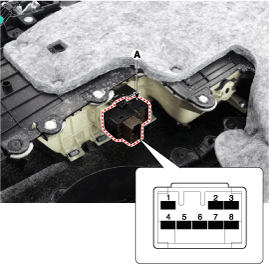
| 3. |
Remove the power window switch assembly (A) after loosening the mounting
screws.
|
| 4. |
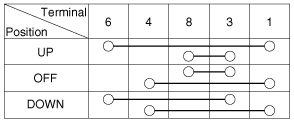
Check for continuity between the terminals in each switch position according
to the table. If the continuity condition is not normal, replace the
switch.
|

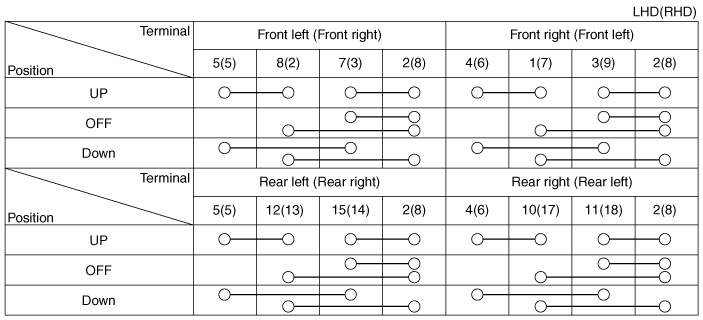
Passenger / Rear Power Window Switch Inspection
| 1. |
Disconnect the negative (-) battery terminal.
|
| 2. |
Remove the front door trim.
(Refer to Body - "Front Door Trim")
(Refer to Body - "Rear Door Trim")
|
| 3. |
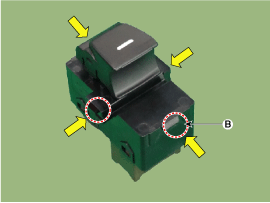
Remove the power window switch (A) after disengaging the mounting clips
(B).
|
| 4. |
Check for continuity between the terminals in each switch position according
to the table. If the continuity condition is not normal, replace the
switch.
|
Diagnosis with GDS
| 1. |
The body electrocal system can be quickly diagnosed failed parts with
vehicle diagnostic system (GDS)
The diagnostic system (GDS) provides the following information.
|
| 2. |
Select the "Car model" and the system to be checked in order to check
the vehicle with the tester.
|
| 3. |
Select the 'Body Control Module (BCM)' to check the Body Control Module
(BCM).
|
| 4. |
Select the "Current Data" menu to search the current state of the input/output
data.
The input/output data for the sensors corresponding to the door lock
switch can be checked.
|

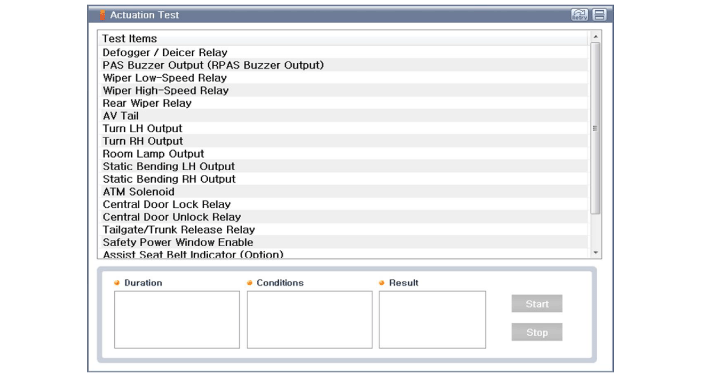
| 5. |
If you will check the power door lock operation forcefully, select "Actuation
test" of BCM.
|
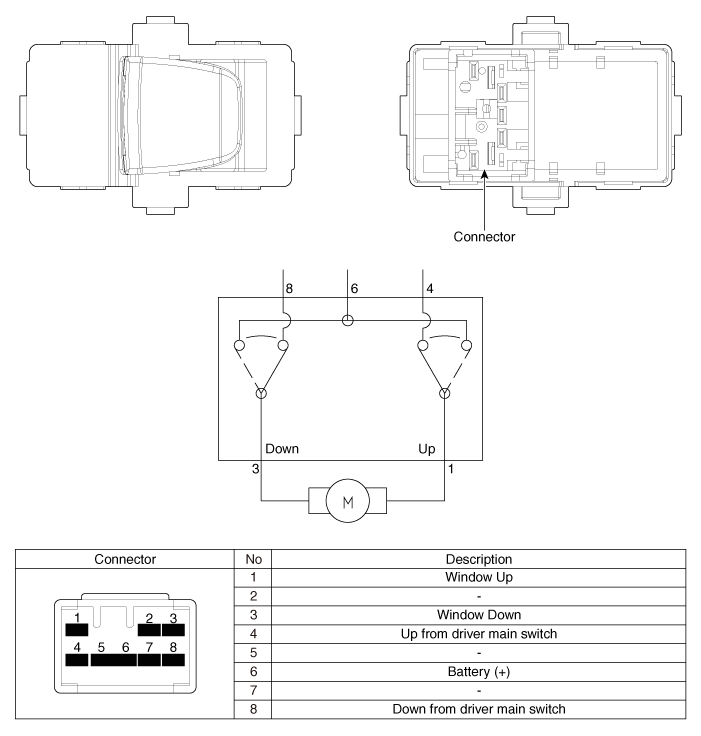
 Power Window Motor
Components and components location
Components
Schematic diagrams
Schematic Diagrams
Repair procedures
Inspection
Front Power Window Motor
1 ...

Other information:
Hyundai Creta GS 2014-2019 Service Manual: Clutch Master Cylinder
Components and components location
Components
1. Clutch pedal assembly
2. Clutch pedal arm
3. Ignition lock & clutch switch
4. Washer
5. Snap pin
6. Master cylinder
7. Reservoir hose
Repair procedures
Removal
1. ...
Hyundai Creta GS 2014-2019 Service Manual: Rear Shock Absorber
Components and components location
Components
1. Shock absorber
2. Dust cover
3. Bumper rubber
4. Insulator assembly
5. Washer
6. Lock nut
7. Insulator cover
Repair procedures
Removal
1.
Loosen the wh ...
© 2017-2026 www.hcrmangs.com
